
Marta 🌿🐸 · @Triffen
354 followers · 971 posts · Server floss.social
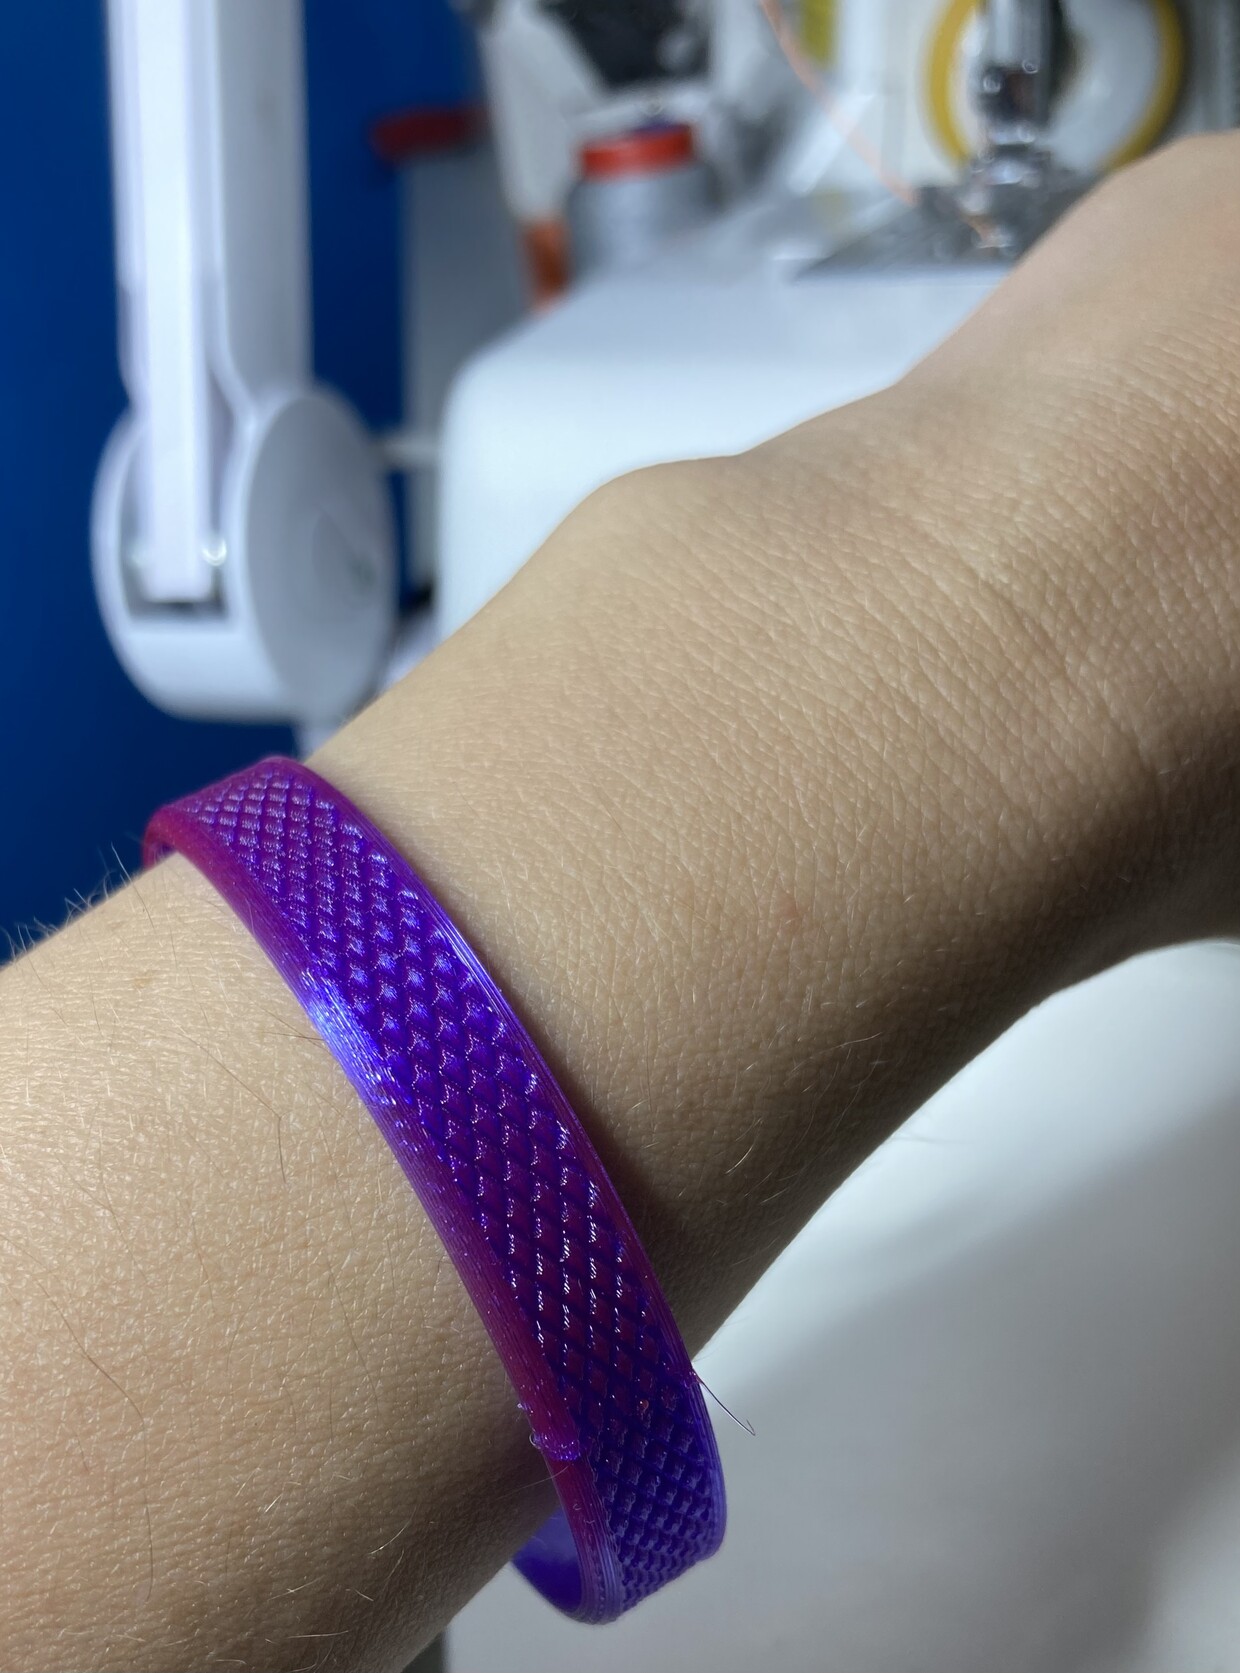
Finally printed with real TPU and could attempt a grip ring for my sewing machine. Previously I made them for two other machines with cylindrical wheels, but this one has a wide edge, so significant stretch is required to go over it.
It's a bit wide though, can't bring myself to cut such a lovely print, so I'll change the model and reprint. Meanwhile it can be worn as a bracelet ;) #3dPrinting #sewing
Marta 🌿🐸 · @Triffen
354 followers · 969 posts · Server floss.social
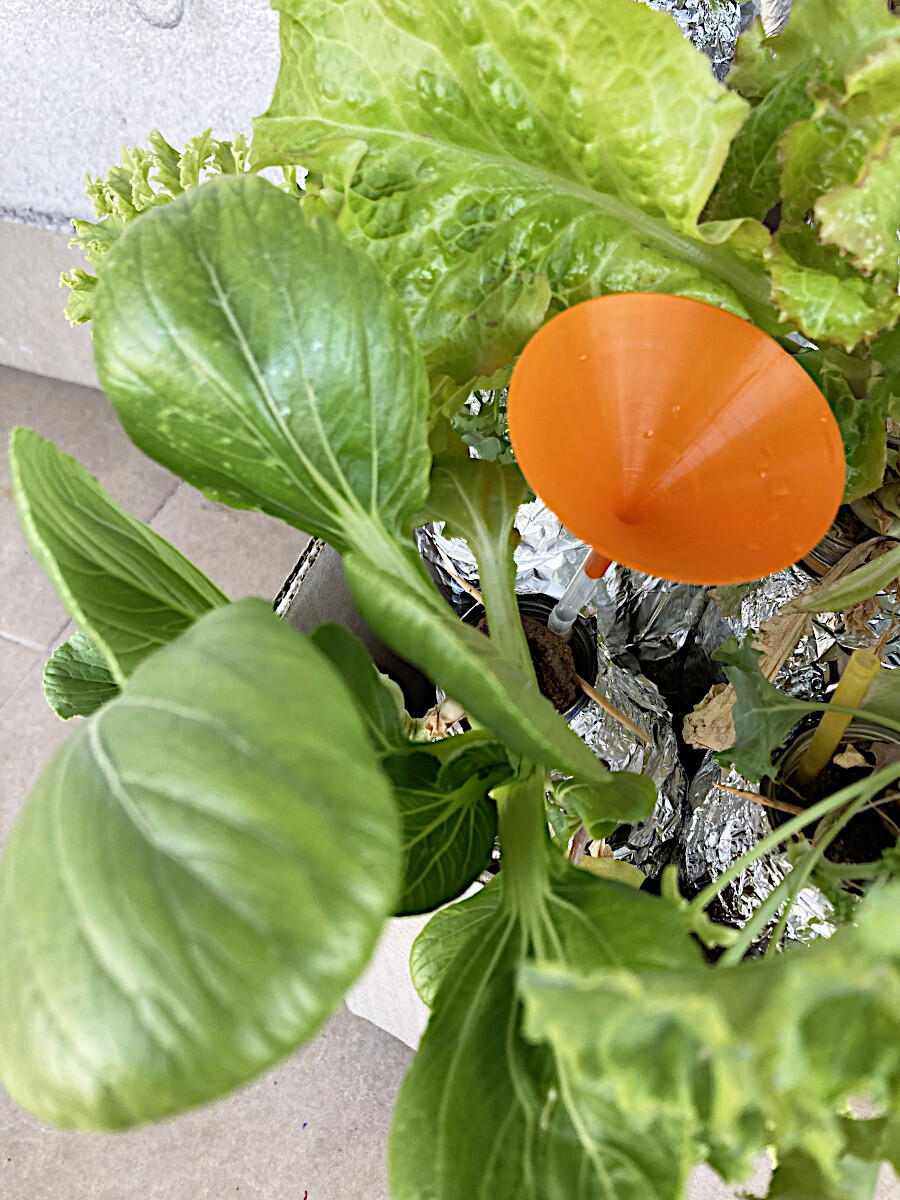
Published my tiny funnel I use to refill #Kratky bottles. It's specifically sized to fit disposable straws I have, and also refill holes of inserts I made, but #FreeCAD source is available, as well as step.
It's modelled as a solid and hollowed by the slicer; #Cura has a handy Surface mode for that.
https://www.printables.com/model/578732-tiny-funnel-that-fits-6mm-disposable-straw-for-kra
#hydroponics #3dPrinting
#kratky #FreeCAD #cura #hydroponics #3Dprinting
Marta 🌿🐸 · @Triffen
342 followers · 926 posts · Server floss.social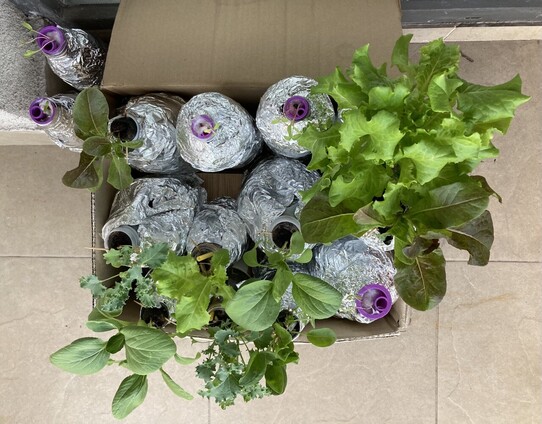
Meanwhile #Kratky #hydroponics happened. I use the most DIY system possible: bottles, 3d printed inserts that allow refilling, and where I didn't use inserts, there are pieces of disposable straw.
Growing on South side open balcony in 30+C is quite different from grow lights inside they use in the videos. Those plants drink a lot, and some liquid evaporates, so I need to refill a lot and designed and printed a tiny funnel to fit the straw (not pictured). #3dPrinting
#kratky #hydroponics #3Dprinting
Marta 🌿🐸 · @Triffen
315 followers · 832 posts · Server floss.social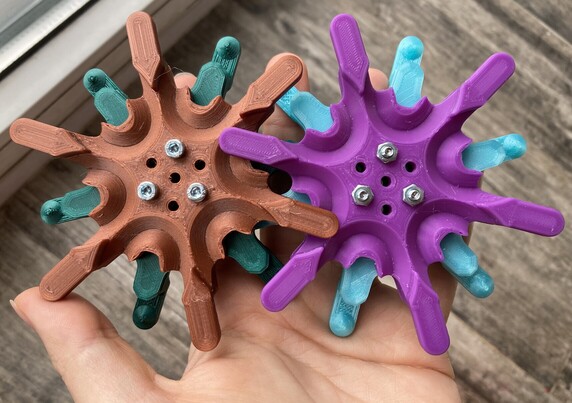
@henryseg @sabetta People will have fun at that stand! I have printed those lovely gears and play with them often 😊 #3dPrinting

Larry (Mr. Prototype) · @fast_code_r_us
299 followers · 866 posts · Server floss.social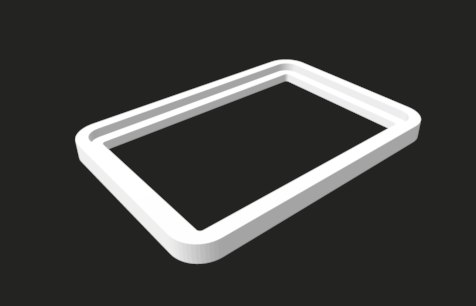
Does anyone else make snap-on "skirts" for their PCBs so that the through-hole parts don't scratch the desk/table they're sitting on?
Marta 🌿🐸 · @Triffen
314 followers · 815 posts · Server floss.socialSomehow I now have a #3dPrinting channel, and the first video is up. The model is by DaveMakesStuff, new #treeSupports in Cura are by Thomas Rahm and, initially, Ultimaker, and I just spent quality 3 hours with round tip pliers ;) It was fun!
https://www.youtube.com/@3dPrintsAndLeaves/
Alex Volkov · @avolkov
78 followers · 473 posts · Server floss.social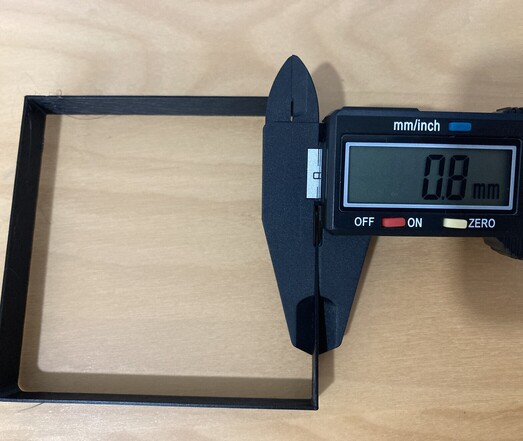
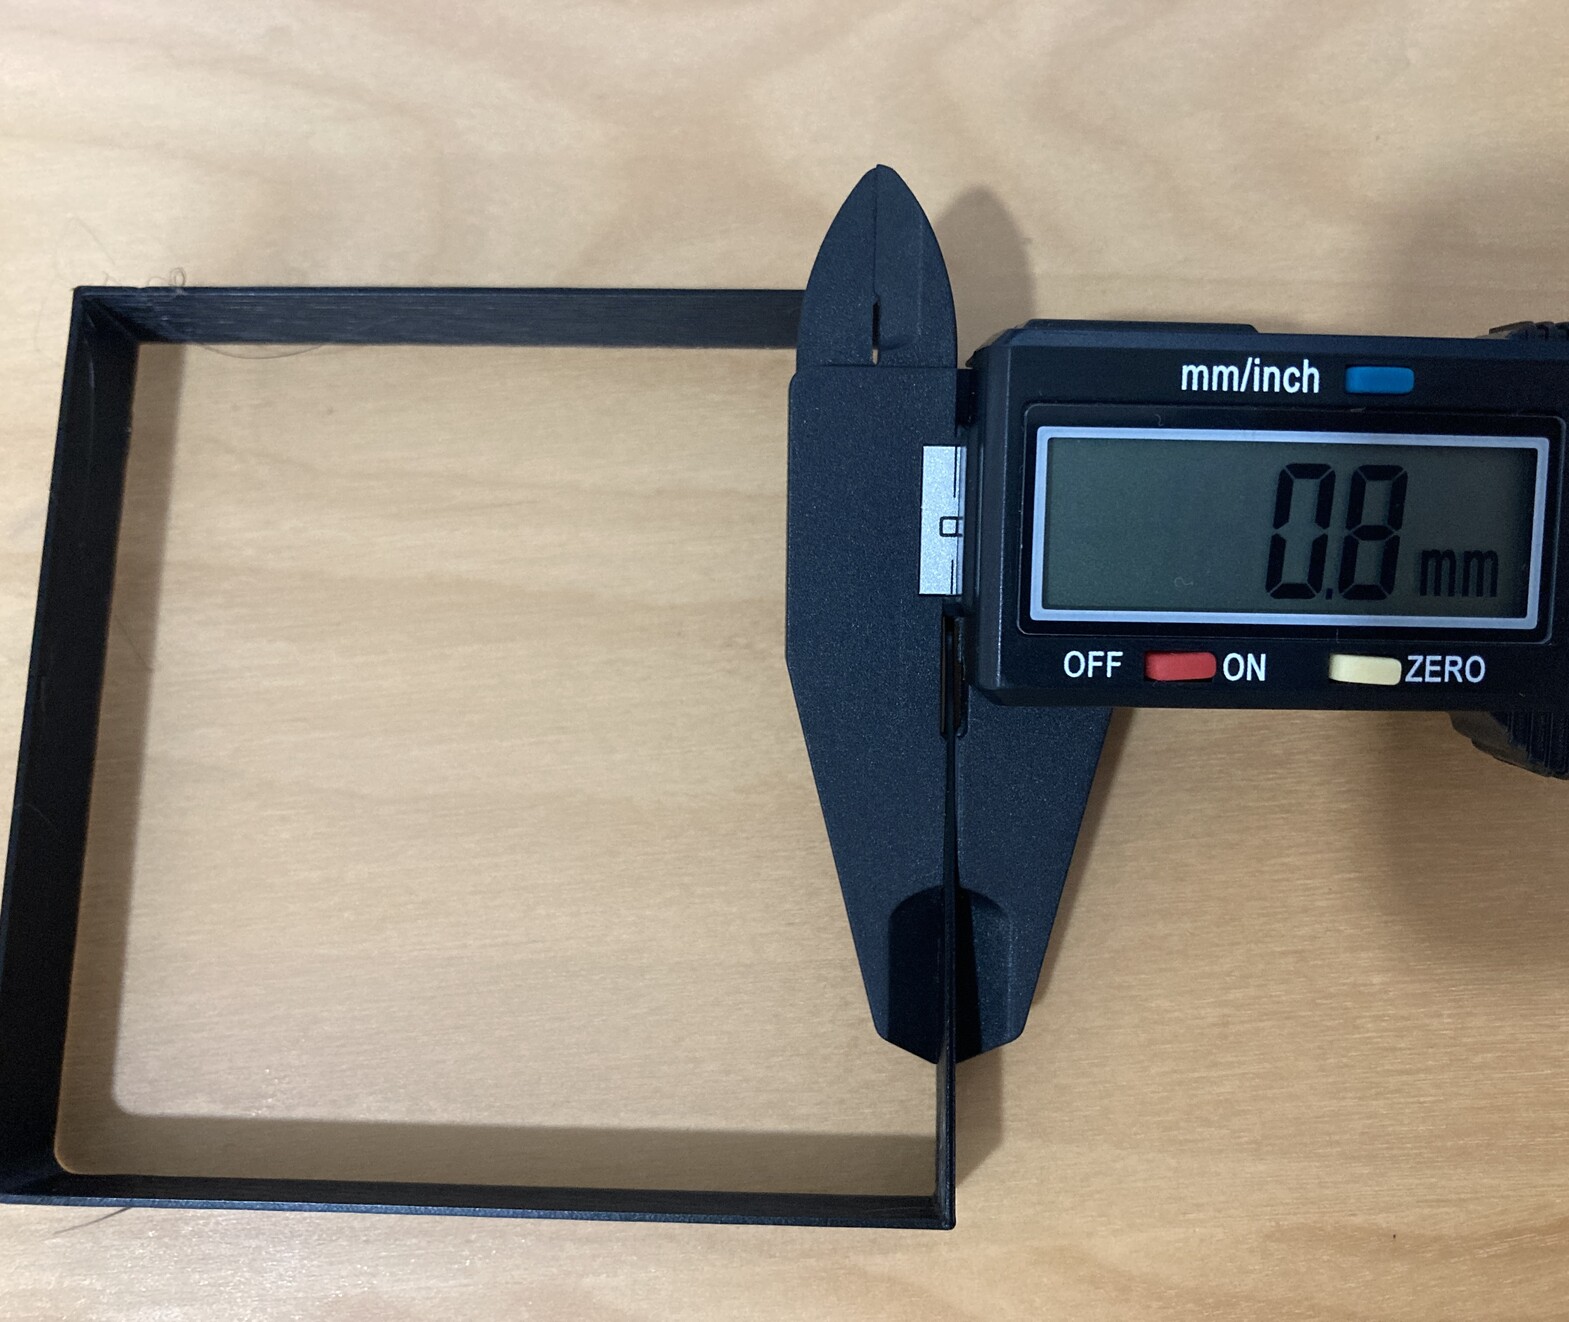
I got a stealthy nozzle diameter upgrade. This calibration cube for 0.4mm nozzle should read 0.42 - 0.45mm I I got 0.86mm
This is so bad, I don’t need micrometer to measure it.
#3Dprinting

Matt Filizzi · @mfilizzi
15 followers · 6 posts · Server floss.socialI was at a convention this past weekend and a large number of the vendors were selling 3d printed items that I KNOW they didn't design, and made me wonder how many of them had the rights to sell those items.
Then I saw this Make article today:
https://makezine.com/article/digital-fabrication/3d-printing-workshop/why-are-major-3d-print-repositories-adding-payment-systems/

Eskibrew · @eskibrew
98 followers · 197 posts · Server floss.social
I recently got an Anycubic photon mono 4k resin printer and it's very impressive but the scale of prints are wrong 🤔 Height is fine but X and Y incorrect. See photo showing the same model printed in PLA vs resin. Both sliced using PrusaSlicer. PrusaSlicer bed size set correctly and scaling set to 1, 1, 1. Any ideas what m doing wrong? #3Dprinting #3Dprinted

Larry (Mr. Prototype) 🇮🇹🇧🇷🇺🇲 · @fast_code_r_us
250 followers · 708 posts · Server floss.social
Getting closer to a workable 3D case. It takes me a few iterations to get everything to fit nicely. The SunLu green PLA prints well on my Prusa Mini+.
Marta 🌿🐸 · @Triffen
265 followers · 610 posts · Server floss.social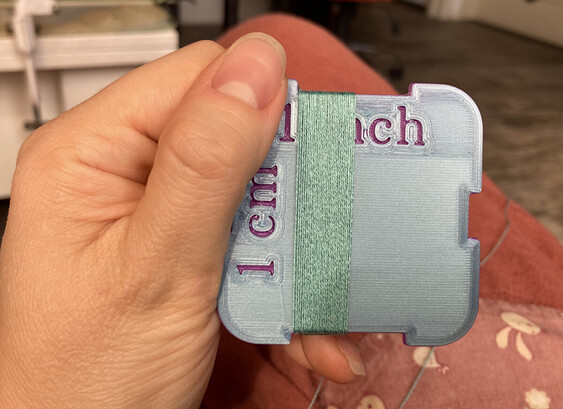
Got annoyed using a ruler as wraps per inch gauge, looked around for a model, and not a single one includes metric units! Also many have these American yarn categories written, like Fingering/Sport, that mean nothing here and not much for #weaving anyway. So I've designed (in #FreeCAD, of course) and printed this unit systems inclusive #wpiGauge, so much better than using a ruler!
#3dPrinting #knitting x
A model link: https://www.printables.com/model/460506-wraps-per-inch-wpi-yarn-gauge-metric
#weaving #FreeCAD #wpigauge #3Dprinting #knitting
Marta 🌿🐸 · @Triffen
261 followers · 601 posts · Server floss.social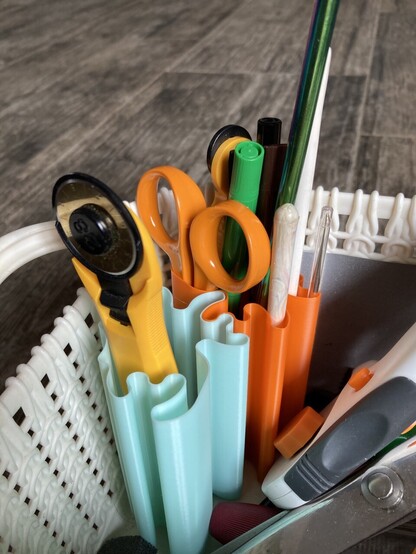
Disorganizer bins by DaveMakesStuff for my #sewing basket. I wanted one or two to separate all the small and thin objects from the big ones. It sits on my standing sewing table and far away, so I mostly stretch my arm forward without looking, and start to dig 😅
Now it's sufficiently disorganized to find stuff easier 😎
Vase mode, 1mm line, 0.4mm nozzle. They are still rather flimsy but they don't hold anything heavy.
#3dPrinting
Marta 🌿🐸 · @Triffen
260 followers · 588 posts · Server floss.social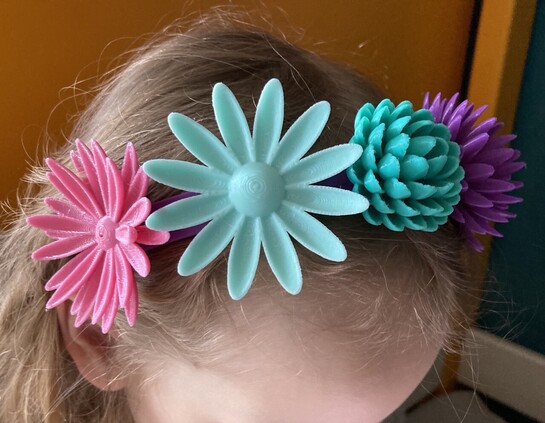
I've started printing flowers for this headband back in the beginning of March, just in case if I didn't find a suitable wreath for her flower costume. I did find it so I put the project away with most flowers printed and no headband.
Then I printed the most complicated flower I wanted (purple), and after an unusable headband 😩 the next model was perfect.
Used acrylic tape to fix the flowers to the band, and done.
I think the next step is to start using a heat gun for smoothing😎
#3dPrinting
Marta 🌿🐸 · @Triffen
259 followers · 577 posts · Server floss.social
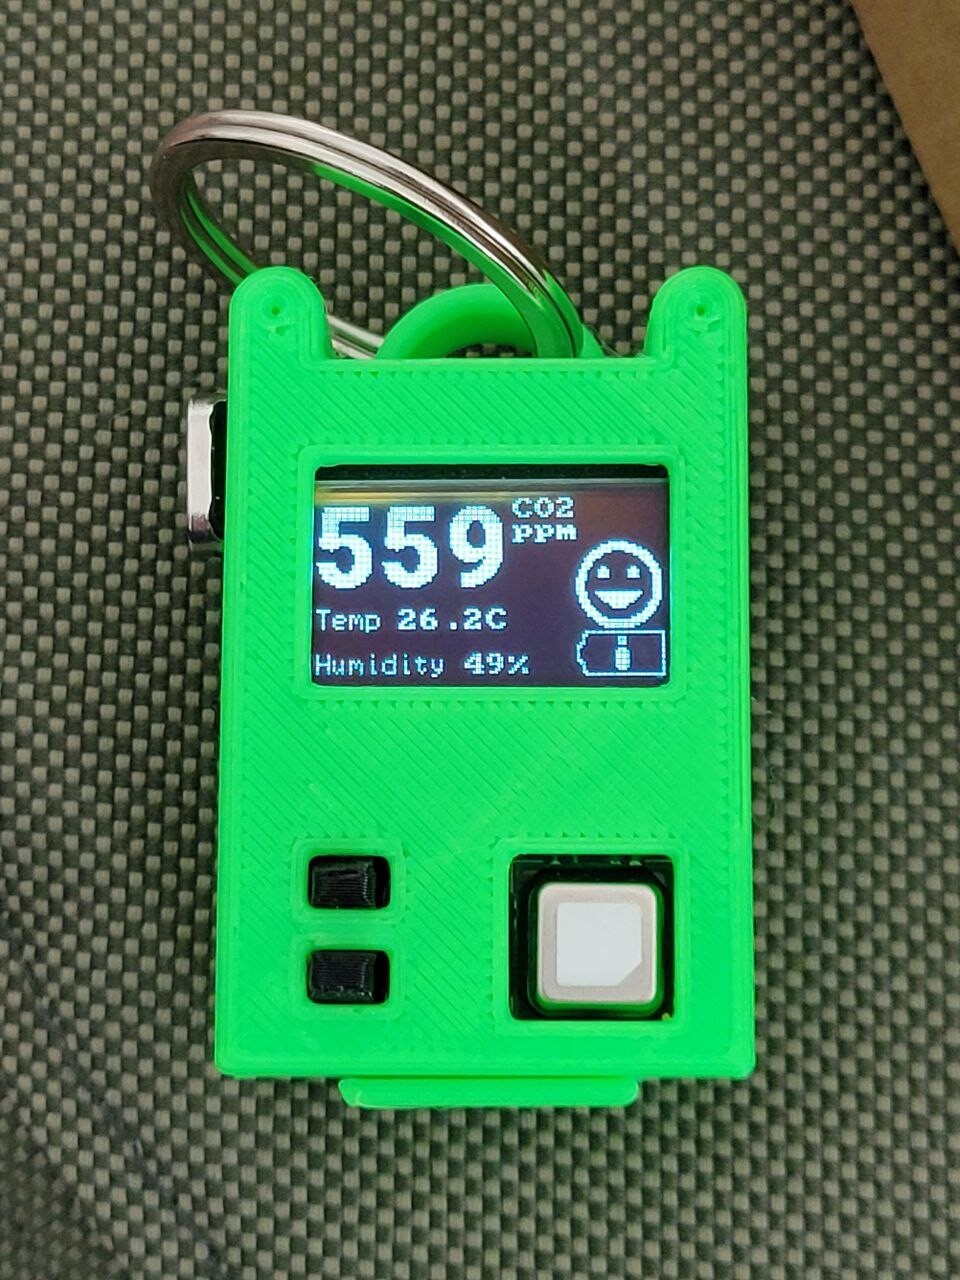
So I've tried a thing called FR4, which is some variation of G10, a circuit board material. I've ordered a thin sheet, used a spare bed magnet to glue to it, and have been testing it with PETG.
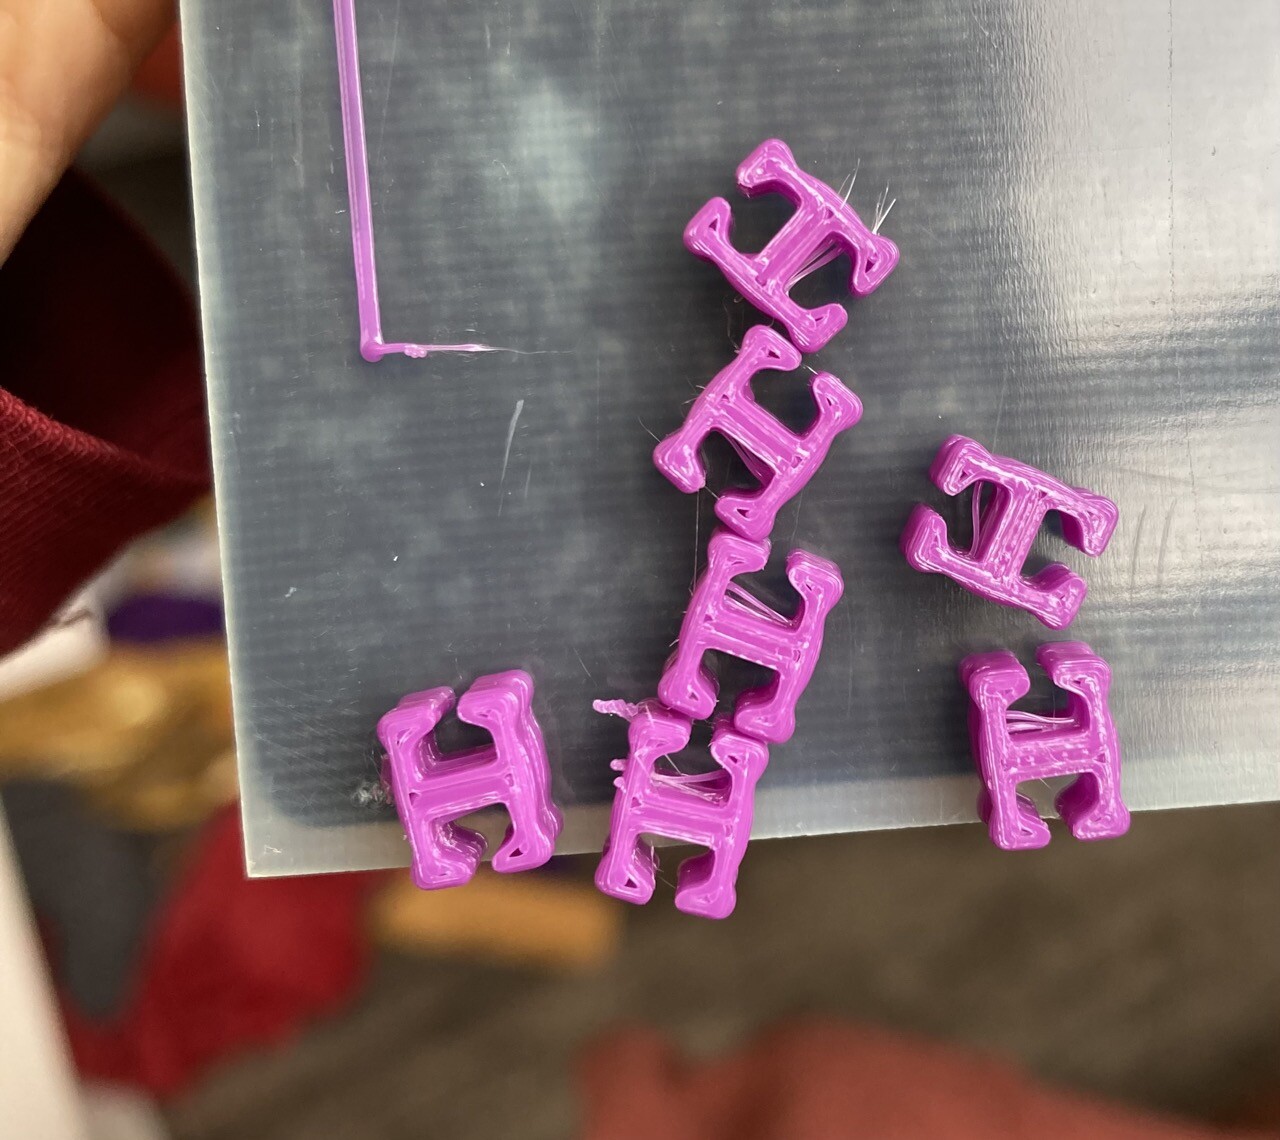
I was unimpressed at reasonable 70 and 80 degrees temp, but 85 works a treat! If you know #printablok, these are tiny and fiddly, especially connectors on the 1st.
Keep in mind that I have 2 magnets between the heater and FR4, so need more temp to hold the prints. #3dPrinting #garolite
#printablok #3Dprinting #garolite
Marta 🌿🐸 · @Triffen
253 followers · 561 posts · Server floss.social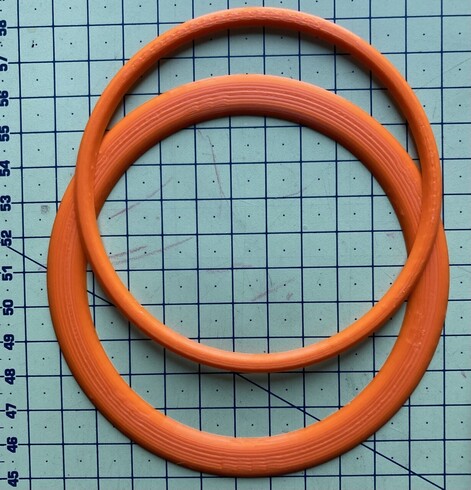
As I plow through my mending pile I knew I couldn't add seam allowance to each circle to sew in, by hand, and also I found a circle size that works well for most sleeves and knees. So I made a circle in Inkscape for that size, and projected it for at least 4 repairs. I struggled sewing them in but that's not easy technique, I thought.
Then I made and printed a template to trace around as cutting circles is easier with scissors. Continue in the thread.
#sewing #3dPrinting
Marta 🌿🐸 · @Triffen
250 followers · 559 posts · Server floss.social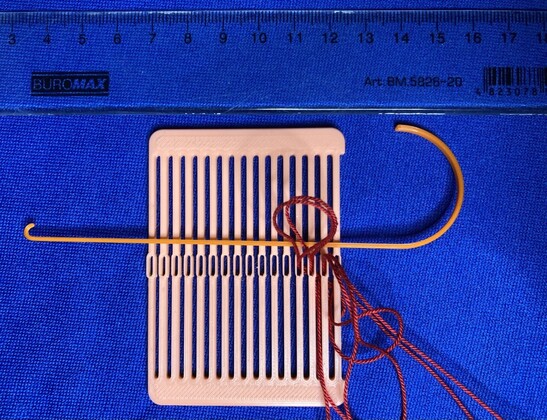
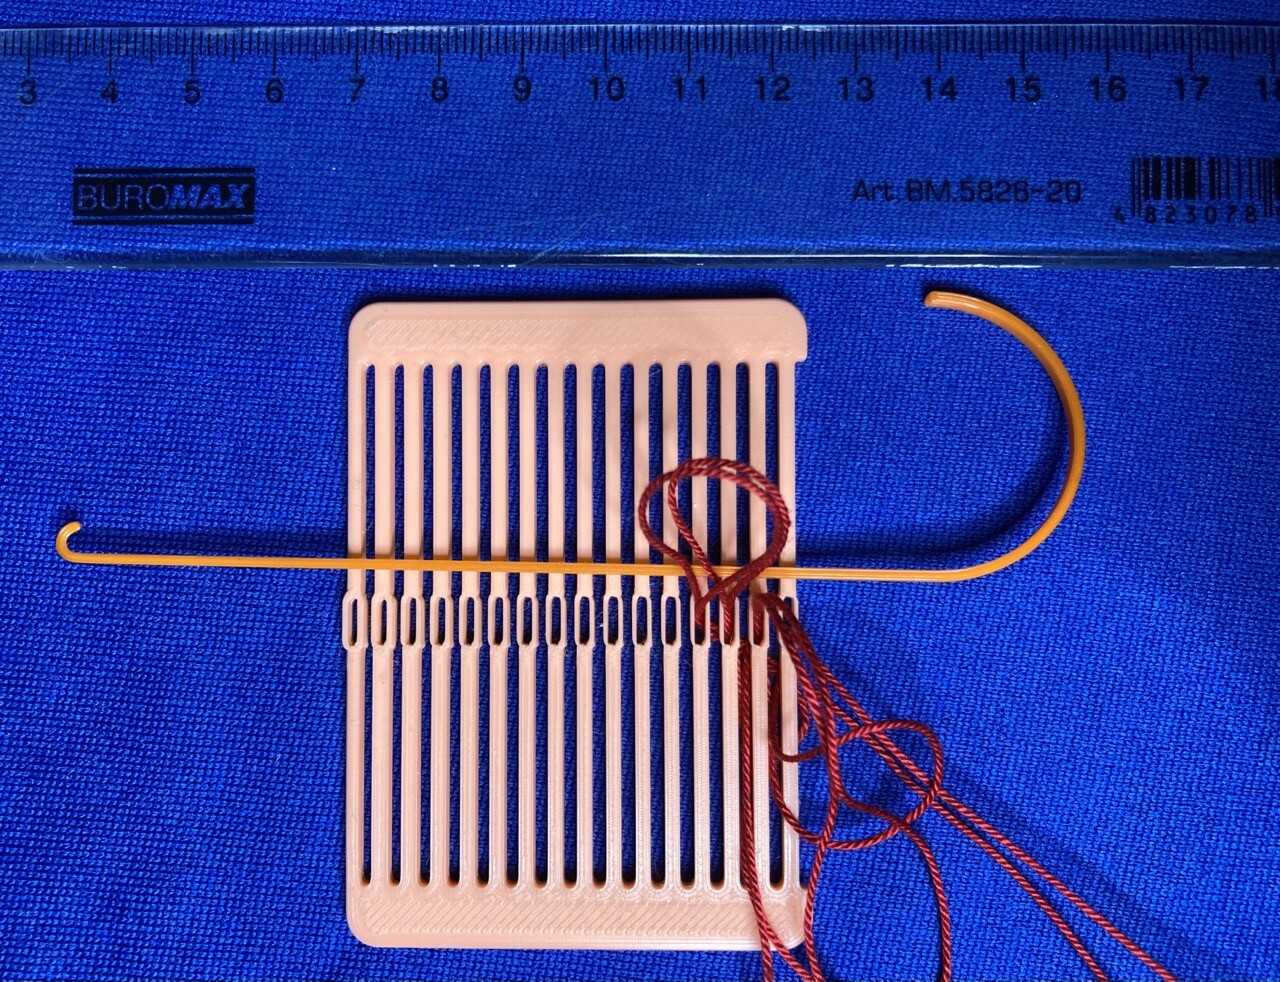
I've been playing with pivoting in #FreeCAD some more, figured it out (and I think there is a bug which caused it not working before), and decided to print it. The smaller side is only 0.6mm thick and 5mm tall, so it can pass the holes in the middle and carry the yarn with it.
There are a warping hook and a 15 dent rigid heddle, 3d printed #weaving tools of my design {that I've been too unmotivated/perfectionist to bring to a shareable state}. #3dPrinting #rigidHeddle
#FreeCAD #weaving #3Dprinting #rigidHeddle
Alex Volkov · @avolkov
74 followers · 443 posts · Server floss.social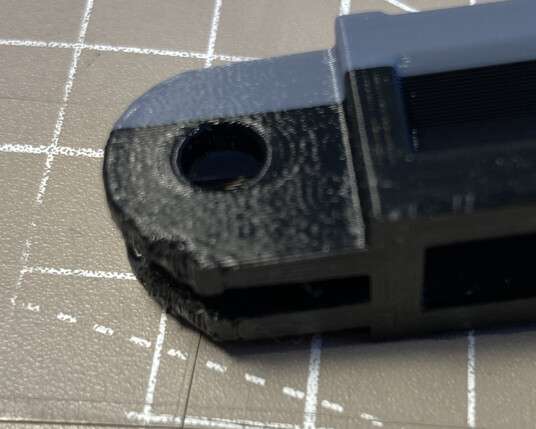
I had another go at printing mooncactus gopro connectors (https://github.com/MoonCactus/gopro_customizable_mounts) this time I used 0.15mm height and supports printed with PETG.
This worked, as in everything fits, however I still got some curling on 2-prong connectors.
Usually when I print with supports filament sags, so having 0.2mm interface distance is what needed, however here the filament curls up, so I need no interface.
#3dprinting
Marta 🌿🐸 · @Triffen
249 followers · 542 posts · Server floss.social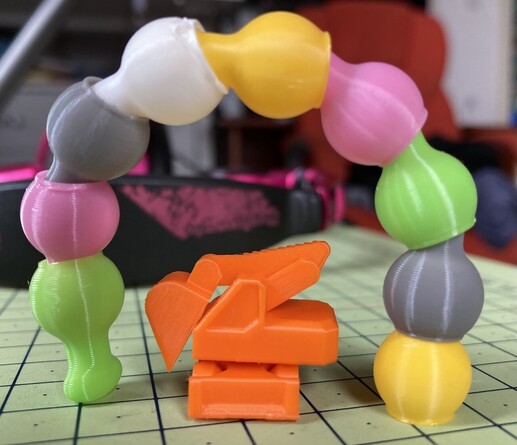
One of Surprise Eggs by Agepbiz but I haven't printed the egg itself. Struggled really hard with this print, it would print in the air and unstick. So I watched it and small bits would unstick and *then* it would print in the air. Calibrated z height with the yesterday print, the next attempt went better but one of those 2x3mm rectangles still flew away.
Resorted to povidone glue, the other option was to switch to a grippy bed _but I've just tuned this one!_ It still pivoted one part #3dPrinting
Marta 🌿🐸 · @Triffen
247 followers · 532 posts · Server floss.social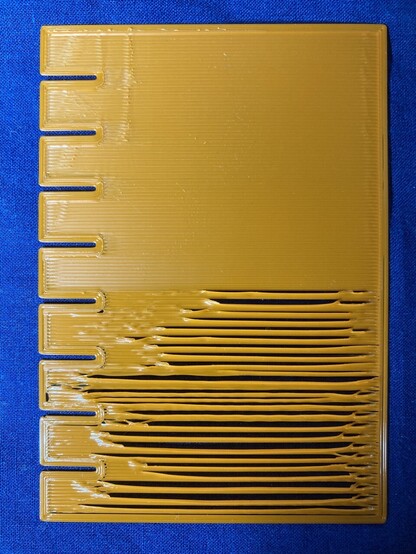
So this Z height calibration test recommended here in #3dPrinting , and it's really good. Sliced to be in vase mode, have [90] for line directions and off I went.
PEI bed is amazing. I had several successful prints while 0.1mm too
high, and they were fine.
Link to the model: https://www.printables.com/model/251587-stress-free-first-layer-calibration-in-less-than-5
Eskibrew · @eskibrew
95 followers · 183 posts · Server floss.social
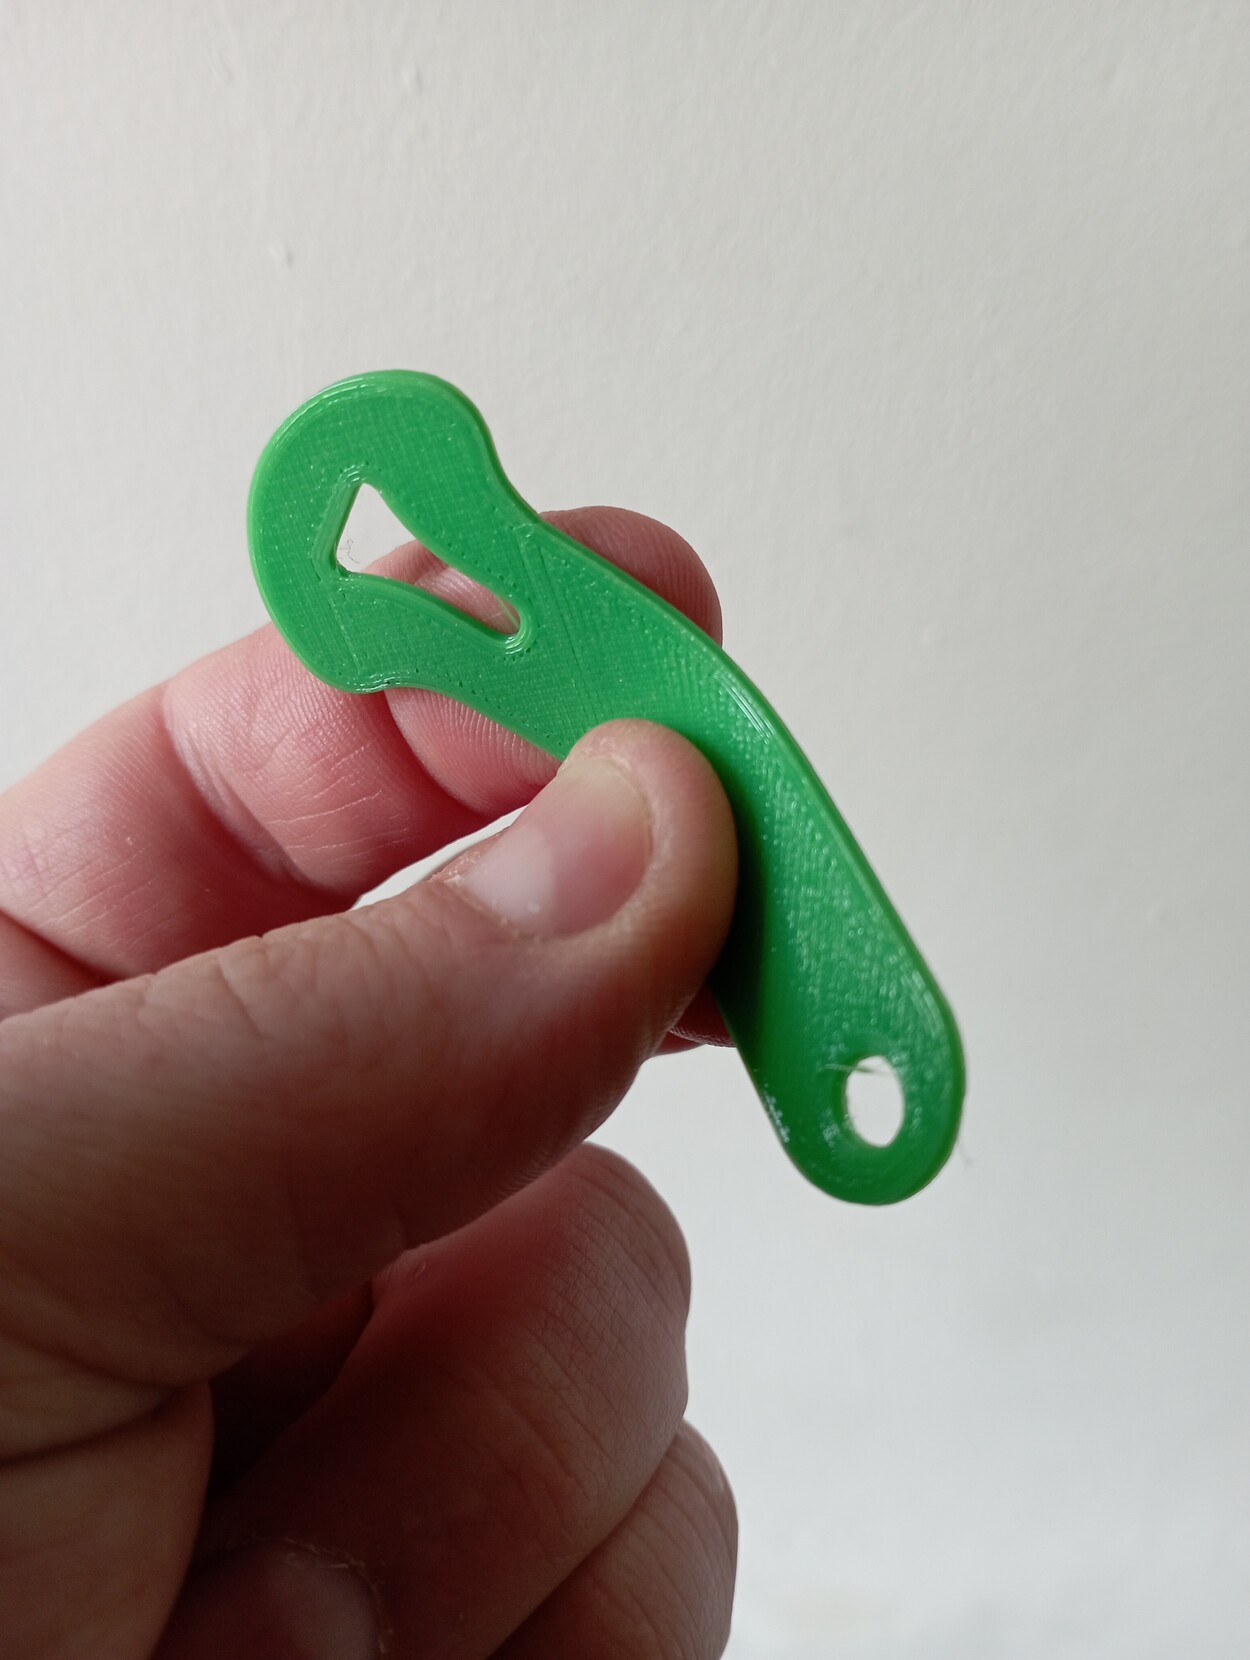
Had my first go #3Dprinting TPU filament to make this flexible strip to attach a clarinet to a neck strap. My machine has a Bowden tube so it took a while to work out suitable temperature to make it work. 🤔