
BASHMAN · @BasicActionGames
105 followers · 394 posts · Server dice.camp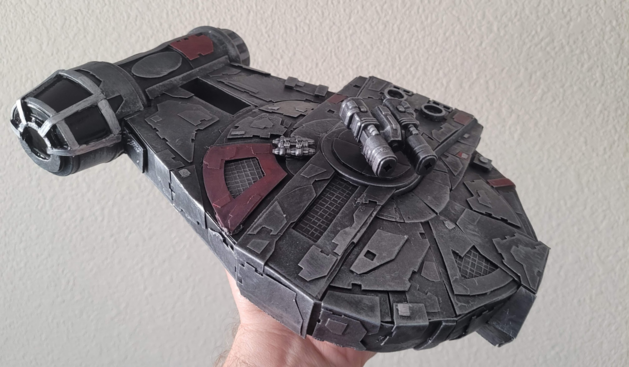
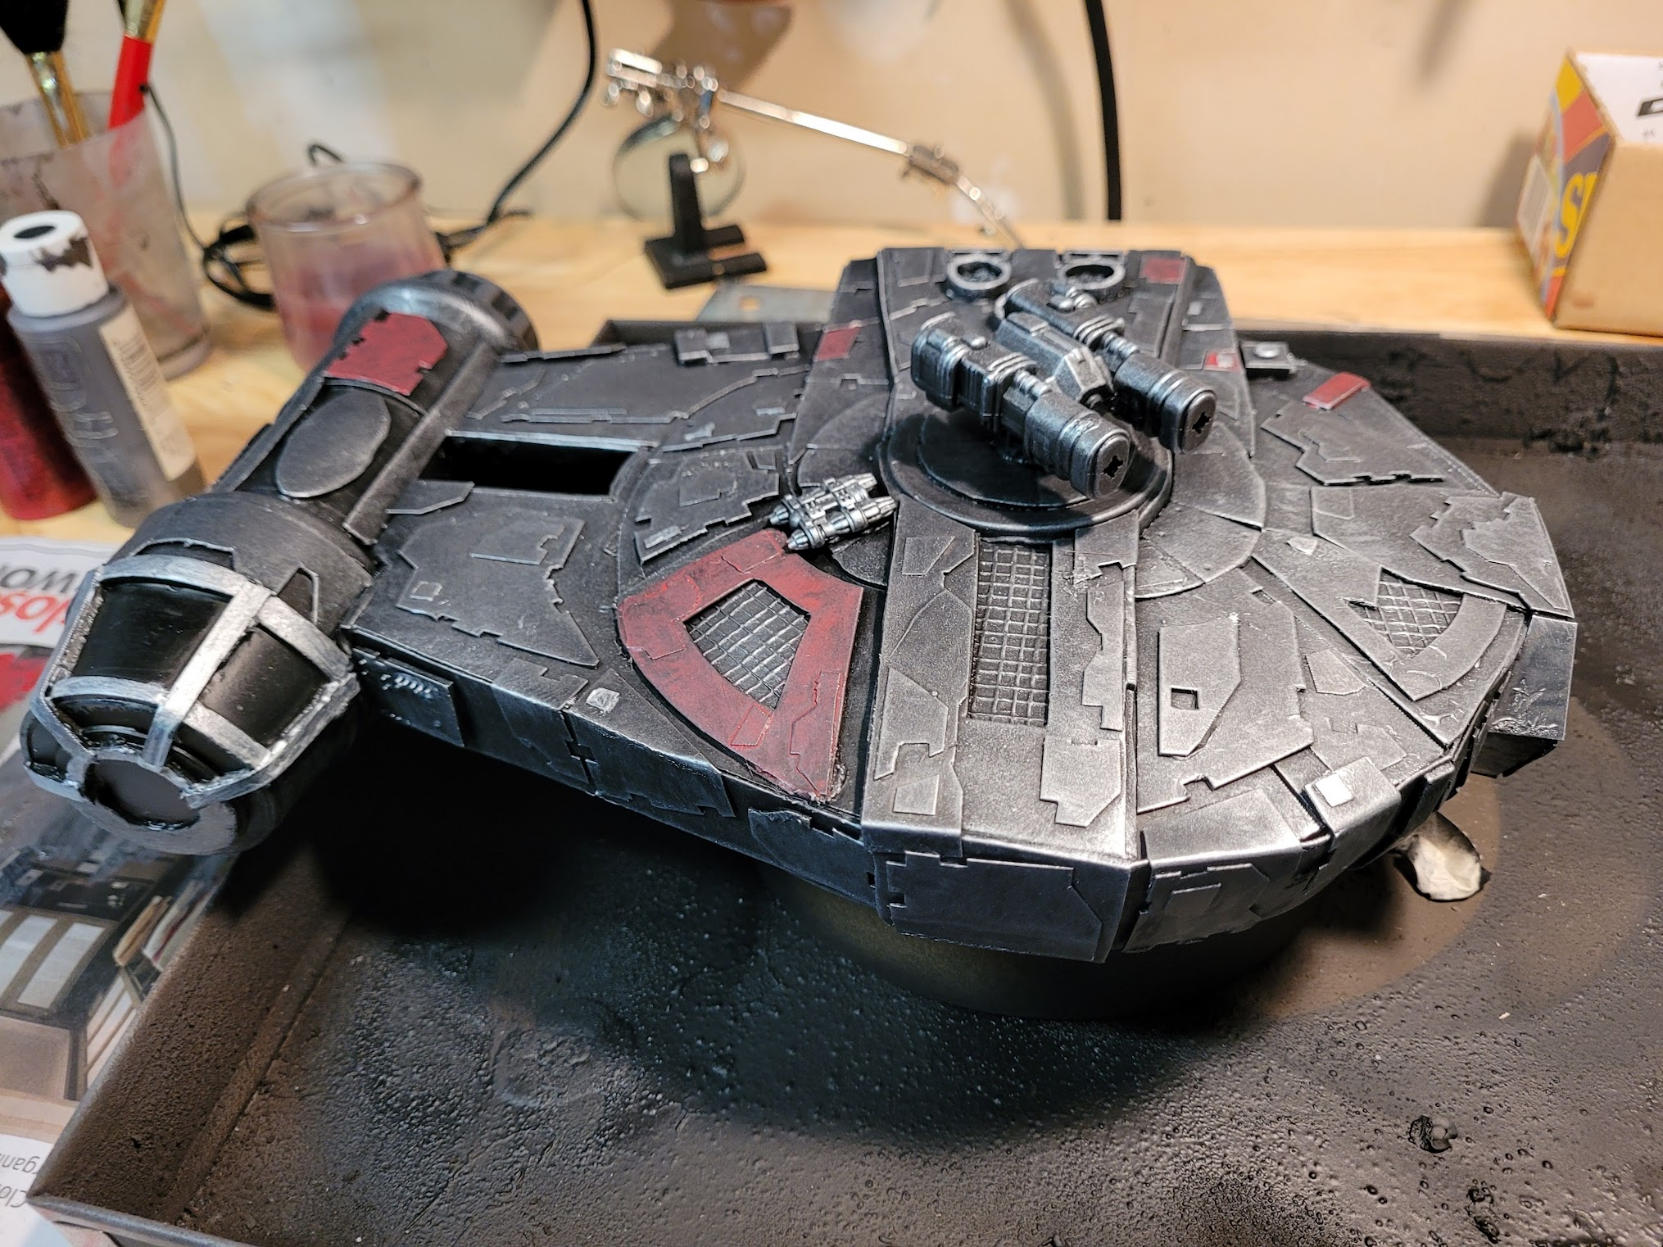
#ttrpg #ScratchBuilt #StarWars #Starship #SciFi #TerrainBuilding finished! Welcome aboard the Nightsister! PEW PEW PEW!
Against the lighter background you can see how dark she actually looks (previous picture was reflecting a lot of light and against a dark background).
#ttrpg #Scratchbuilt #starwars #Starship #scifi #terrainbuilding
BASHMAN · @BasicActionGames
105 followers · 394 posts · Server dice.camp
#ttrpg #ScratchBuilt #StarWars #Starship #SciFi #TerrainBuilding step 13. Finishing Touches.
I drybrush all the gunmetal parts with brushed steel color paint. I paint over the cockpit windows with clear nail polish to make them nice and shiny.
#ttrpg #Scratchbuilt #starwars #Starship #scifi #terrainbuilding
BASHMAN · @BasicActionGames
105 followers · 392 posts · Server dice.camp
#ttrpg #ScratchBuilt #StarWars #Starship #SciFi #TerrainBuilding step 12. Painting.
I drybrush most of it with gunmetal. I paint over some areas with red. I leave the cockpit windows black, paint the cockpit window frames with brushed steel color. The swivel turret is now in place.
#ttrpg #Scratchbuilt #starwars #Starship #scifi #terrainbuilding
BASHMAN · @BasicActionGames
105 followers · 391 posts · Server dice.camp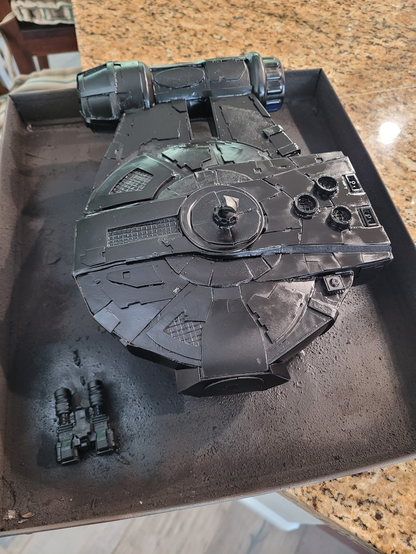
#ttrpg #ScratchBuilt #StarWars #Starship #SciFi #TerrainBuilding step 11.
Blackbombed everything with black spray paint. Some styrene has been welded on with special plastic model glue as well. It sticks to mod-podge and also to other plastic bits.
#ttrpg #Scratchbuilt #starwars #Starship #scifi #terrainbuilding
BASHMAN · @BasicActionGames
105 followers · 390 posts · Server dice.camp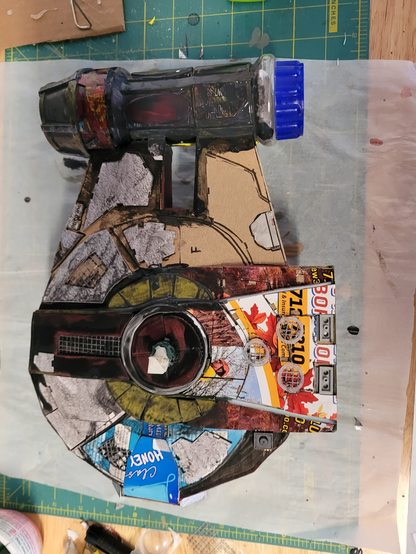
#ttrpg #ScratchBuilt #StarWars #Starship #SciFi #TerrainBuilding step 10.
More paneling added. Some is laminated cardstock cut to shape. Mod podge covers all foam so it can be primed.
#ttrpg #Scratchbuilt #starwars #Starship #scifi #terrainbuilding
BASHMAN · @BasicActionGames
105 followers · 389 posts · Server dice.camp
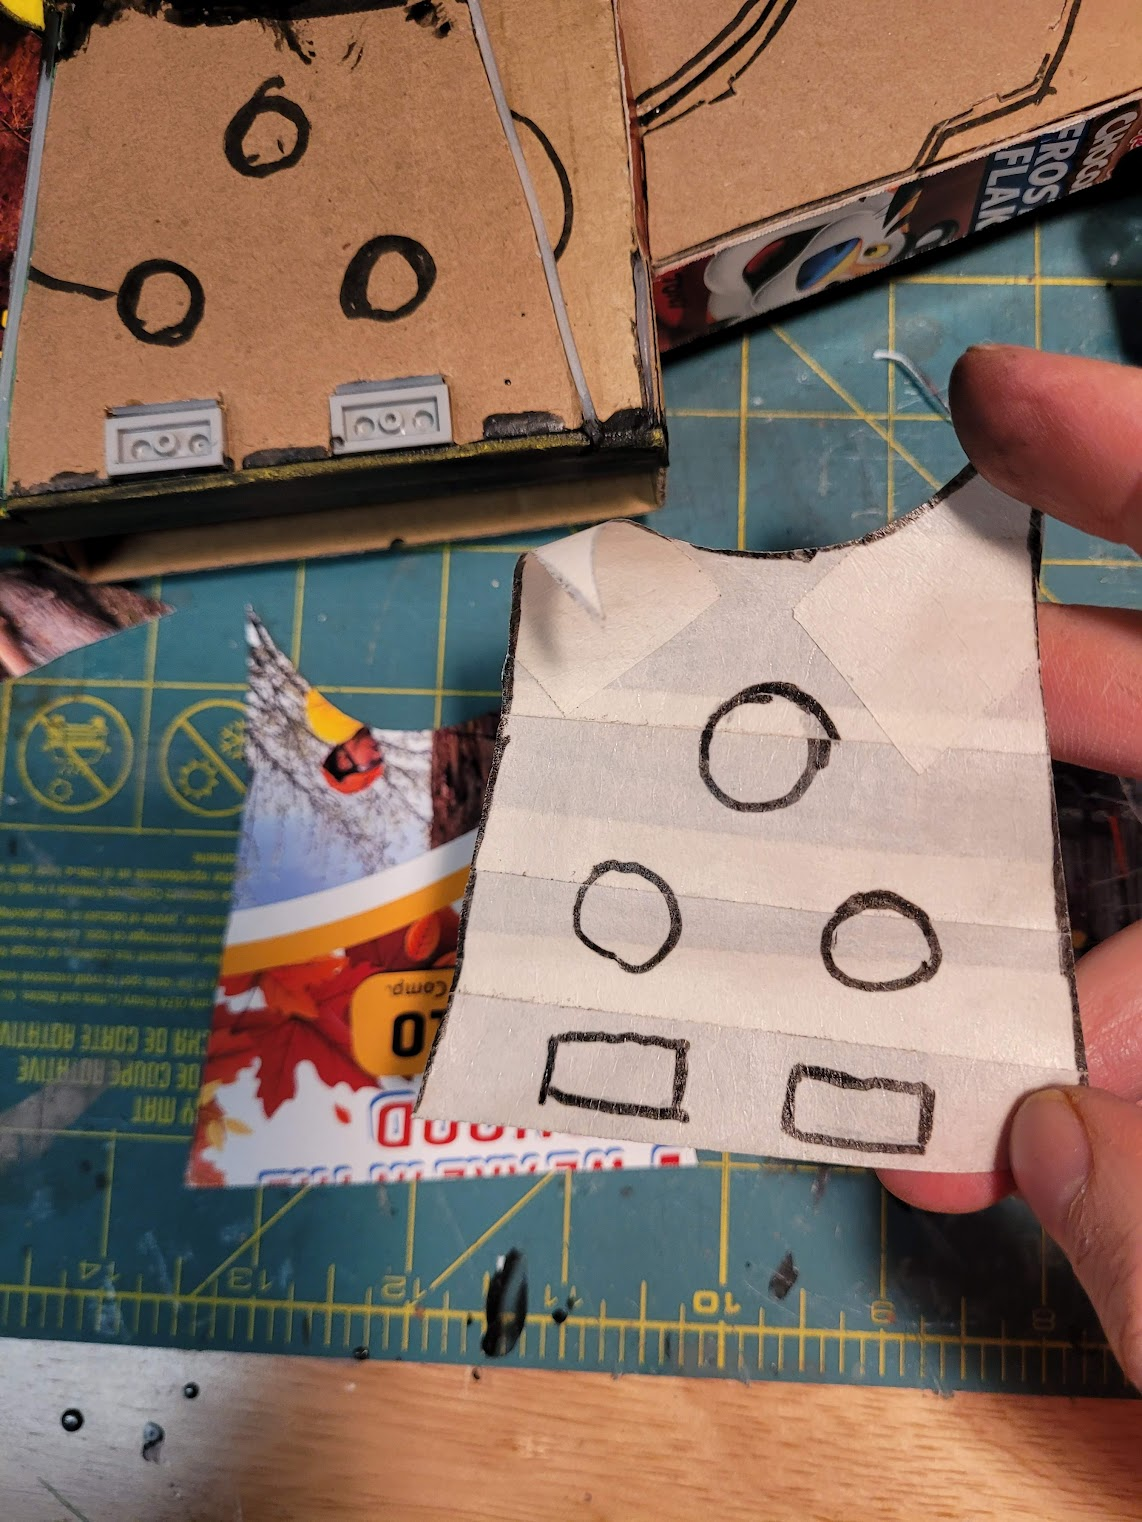
#ttrpg #ScratchBuilt #StarWars #Starship #SciFi #TerrainBuilding step 9.
Copied this technique from #Cosplay videos I've seen. Used masking tape to make a template to make a perfect fit for my paneling over an area.
#ttrpg #Scratchbuilt #starwars #Starship #scifi #terrainbuilding #cosplay
BASHMAN · @BasicActionGames
105 followers · 388 posts · Server dice.camp
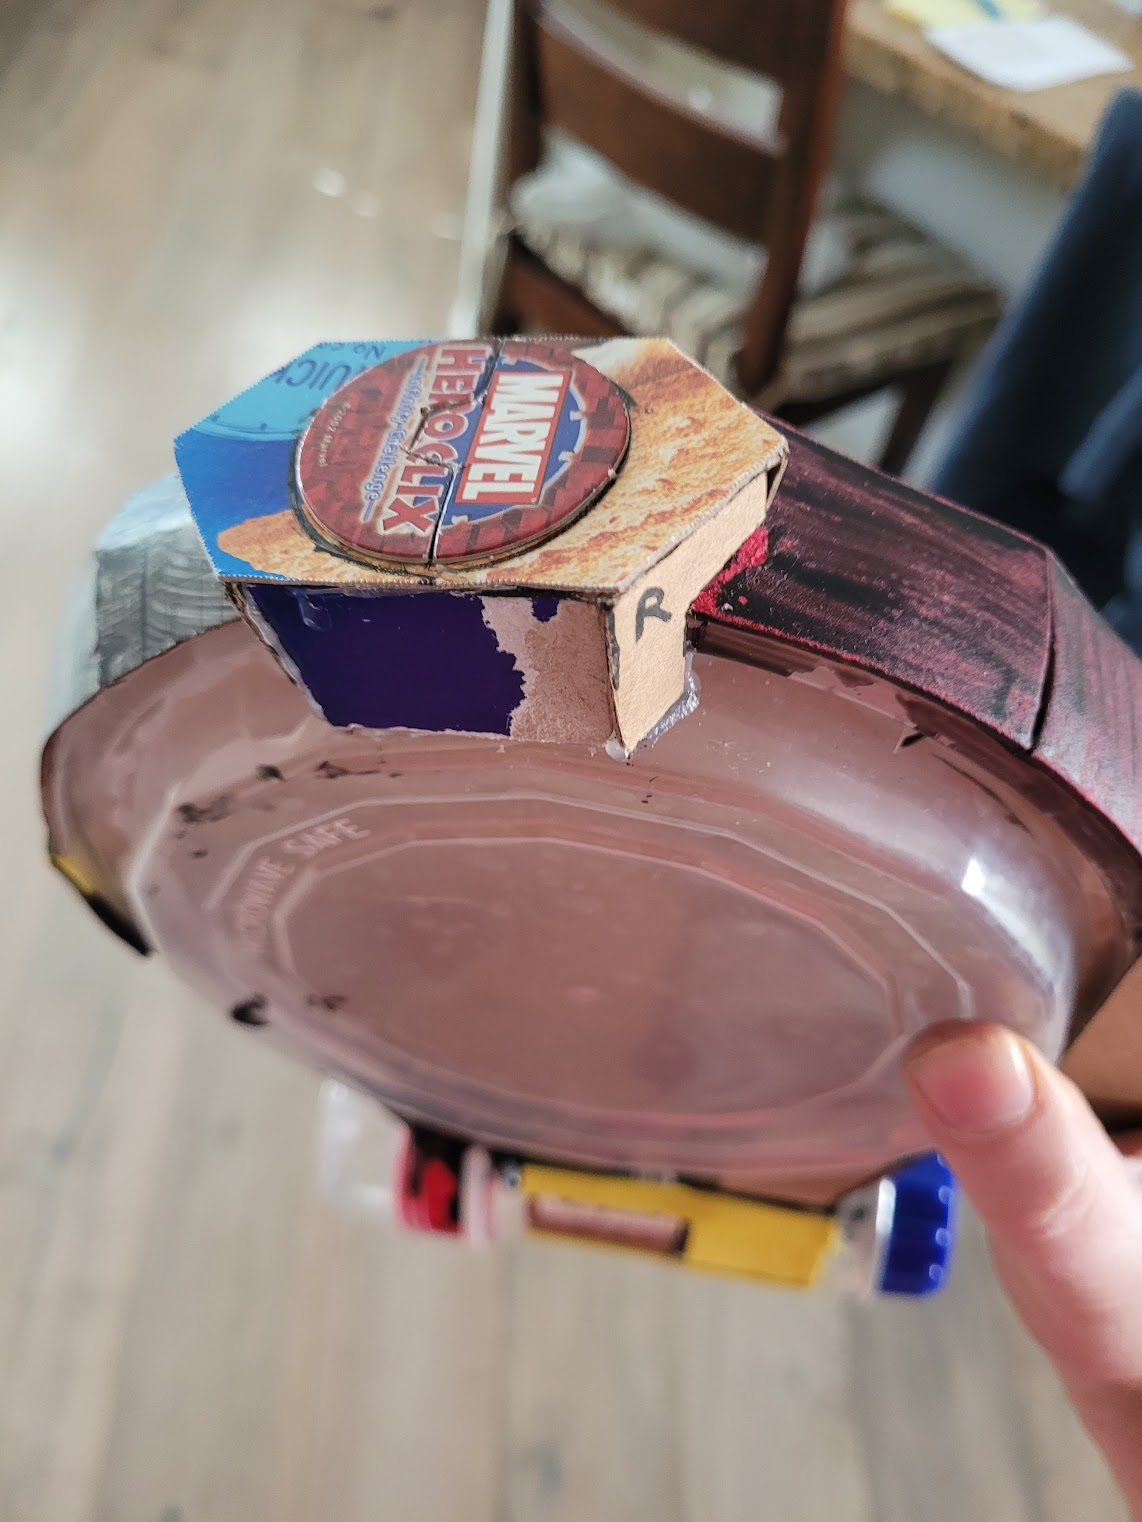
#ttrpg #ScratchBuilt #StarWars #Starship #SciFi #TerrainBuilding step 8.
I built the boarding tube from scratch out of cardboard via trial and error and hot-glued it in place. A Heroclix pog cut in two halves became the airlock. This was a PITA to build as I had to cut panels multiple times to make it fit.
#ttrpg #Scratchbuilt #starwars #Starship #scifi #terrainbuilding
BASHMAN · @BasicActionGames
105 followers · 387 posts · Server dice.camp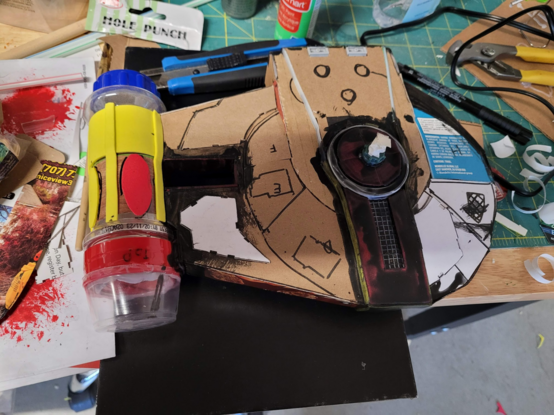
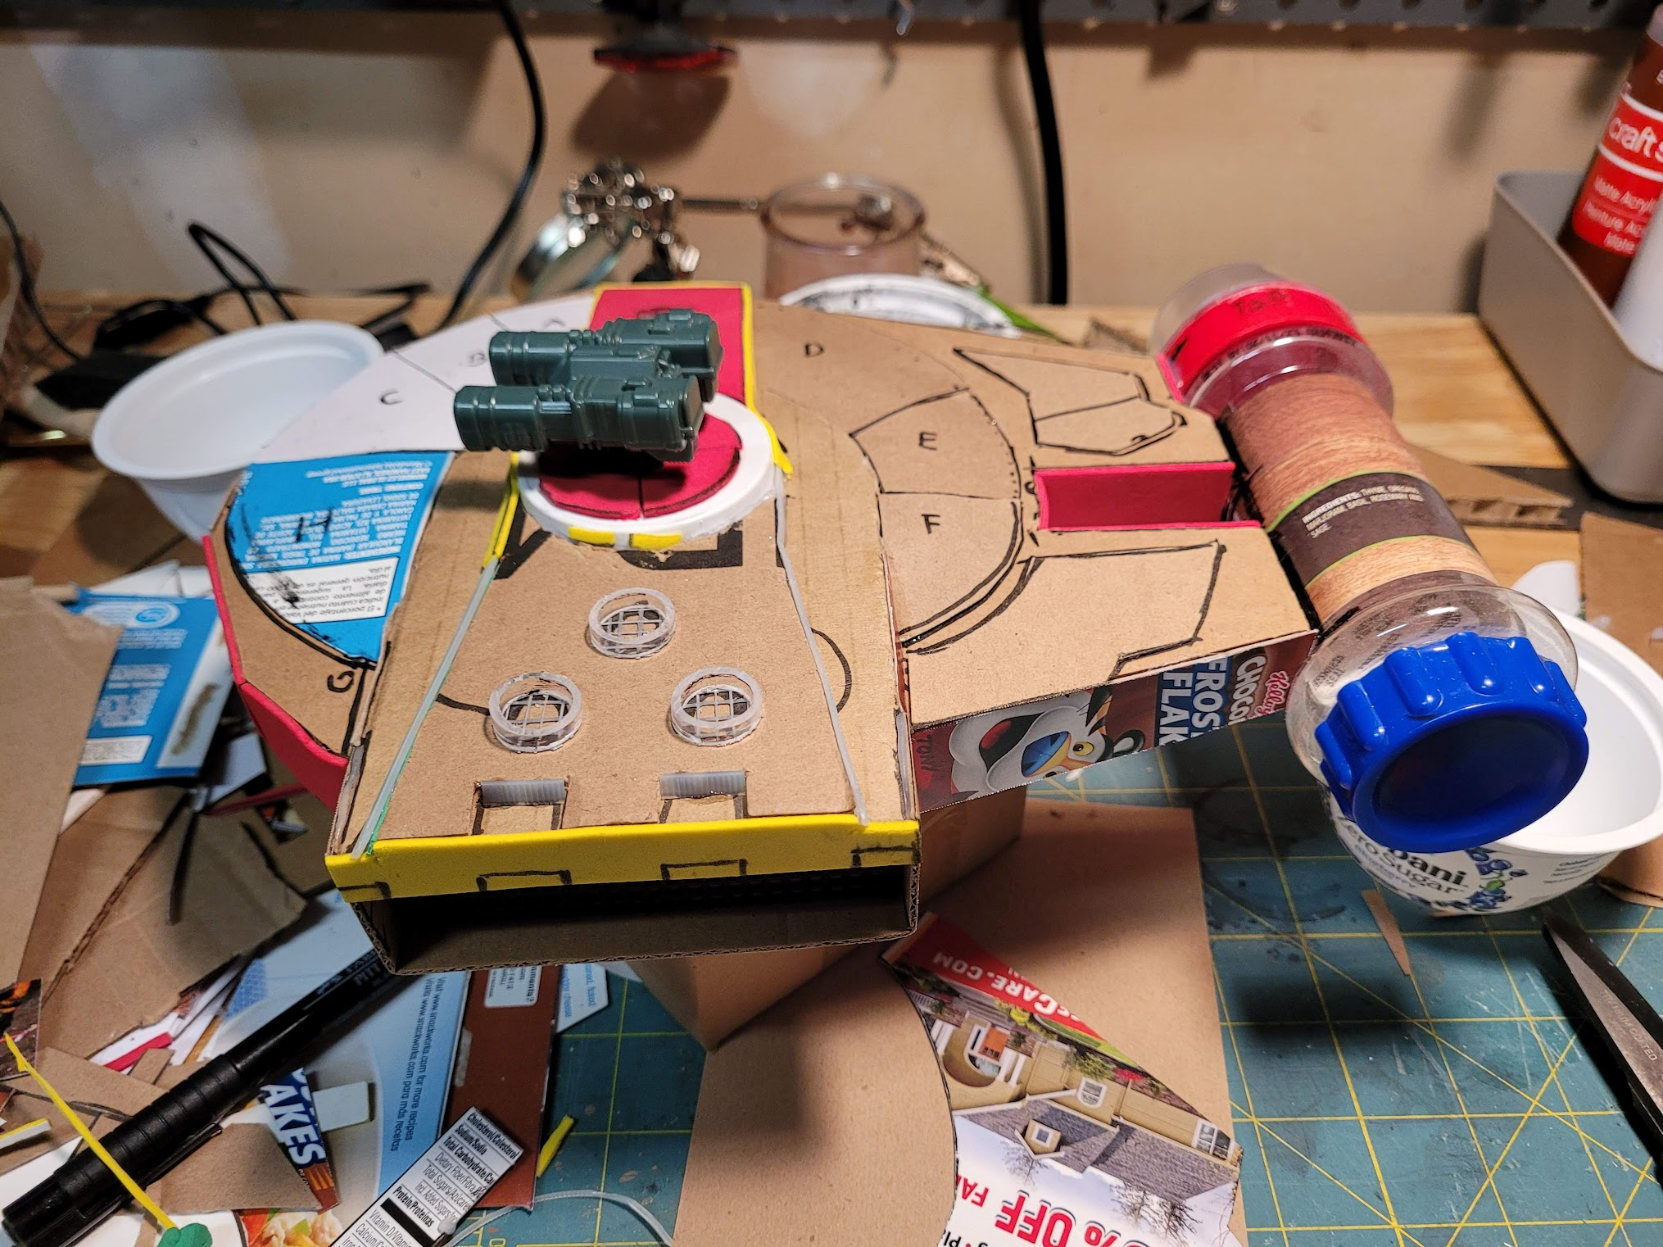
#ttrpg #ScratchBuilt #StarWars #Starship #SciFi #TerrainBuilding step 8.
I begin using craft foam to decorate the cockpit of the ship. Shiny cardboard panels have been added to the hull, with a square hole-punch being used to cut some notches in them. Got that idea from #AdamSavage video on starship paneling.
I apply modpodge over the foam and masking tape over the moving parts of the swivel turret.
A couple dollar store legos are used to make some rectangular vent areas.
#ttrpg #Scratchbuilt #starwars #Starship #scifi #terrainbuilding #adamsavage
BASHMAN · @BasicActionGames
105 followers · 386 posts · Server dice.camp
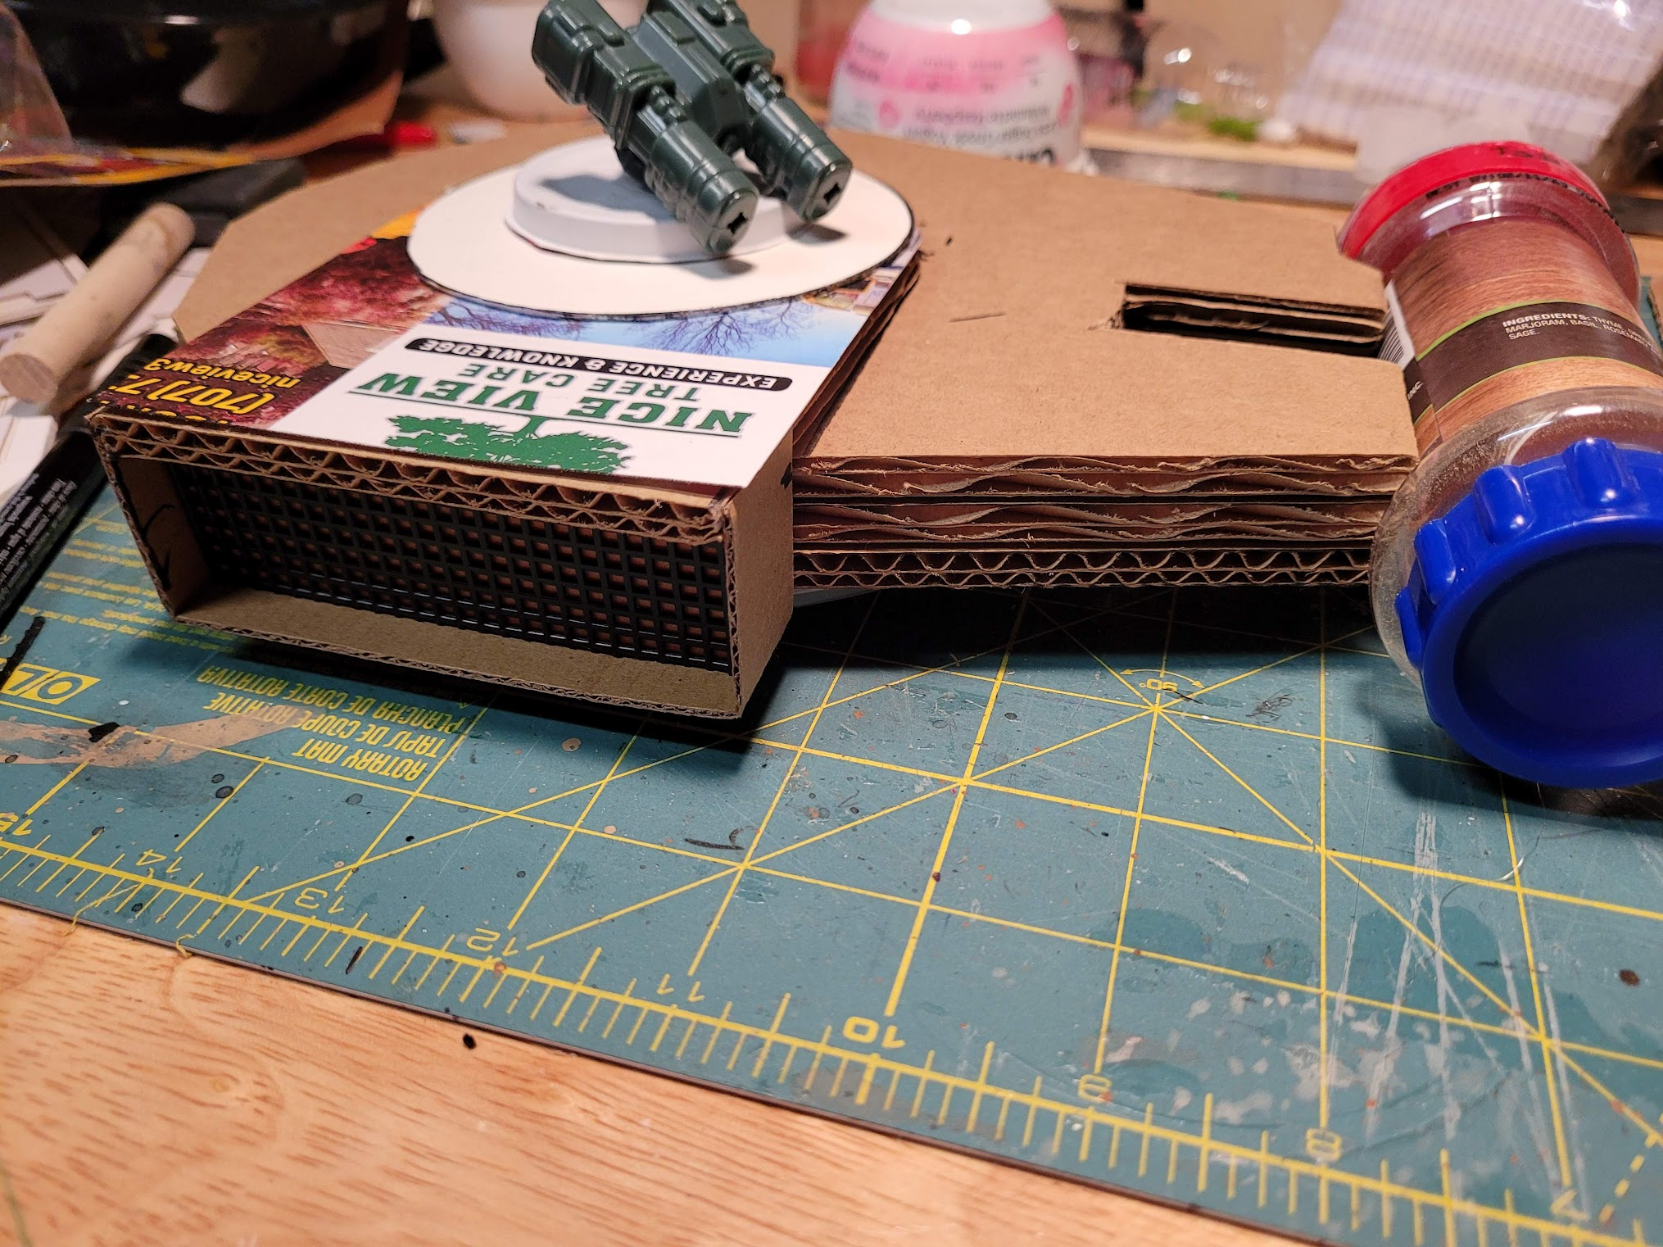
#ttrpg #ScratchBuilt #StarWars #Starship #SciFi #TerrainBuilding step 7.
More craft foam and some cereal box cardstock are added to the hull to completely cover the corrugation. Some zip-ties are hot-glued to the sides of part of the hull to cover thinner corrugated areas.
Some paneling is tested with cardstock (I later replaced this with shinier material; but this is before my first set of styrene arrived in the mail. I became a fan of the styrene once I began using it).
#ttrpg #Scratchbuilt #starwars #Starship #scifi #terrainbuilding
BASHMAN · @BasicActionGames
105 followers · 385 posts · Server dice.camp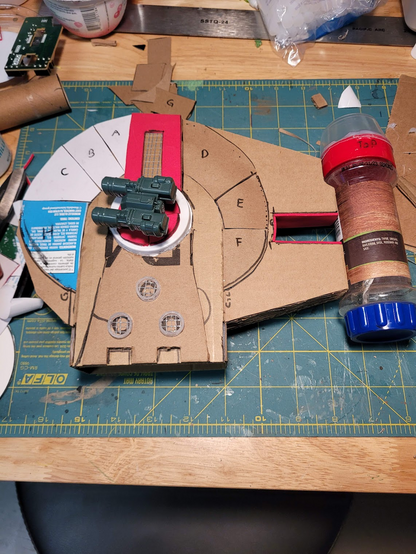
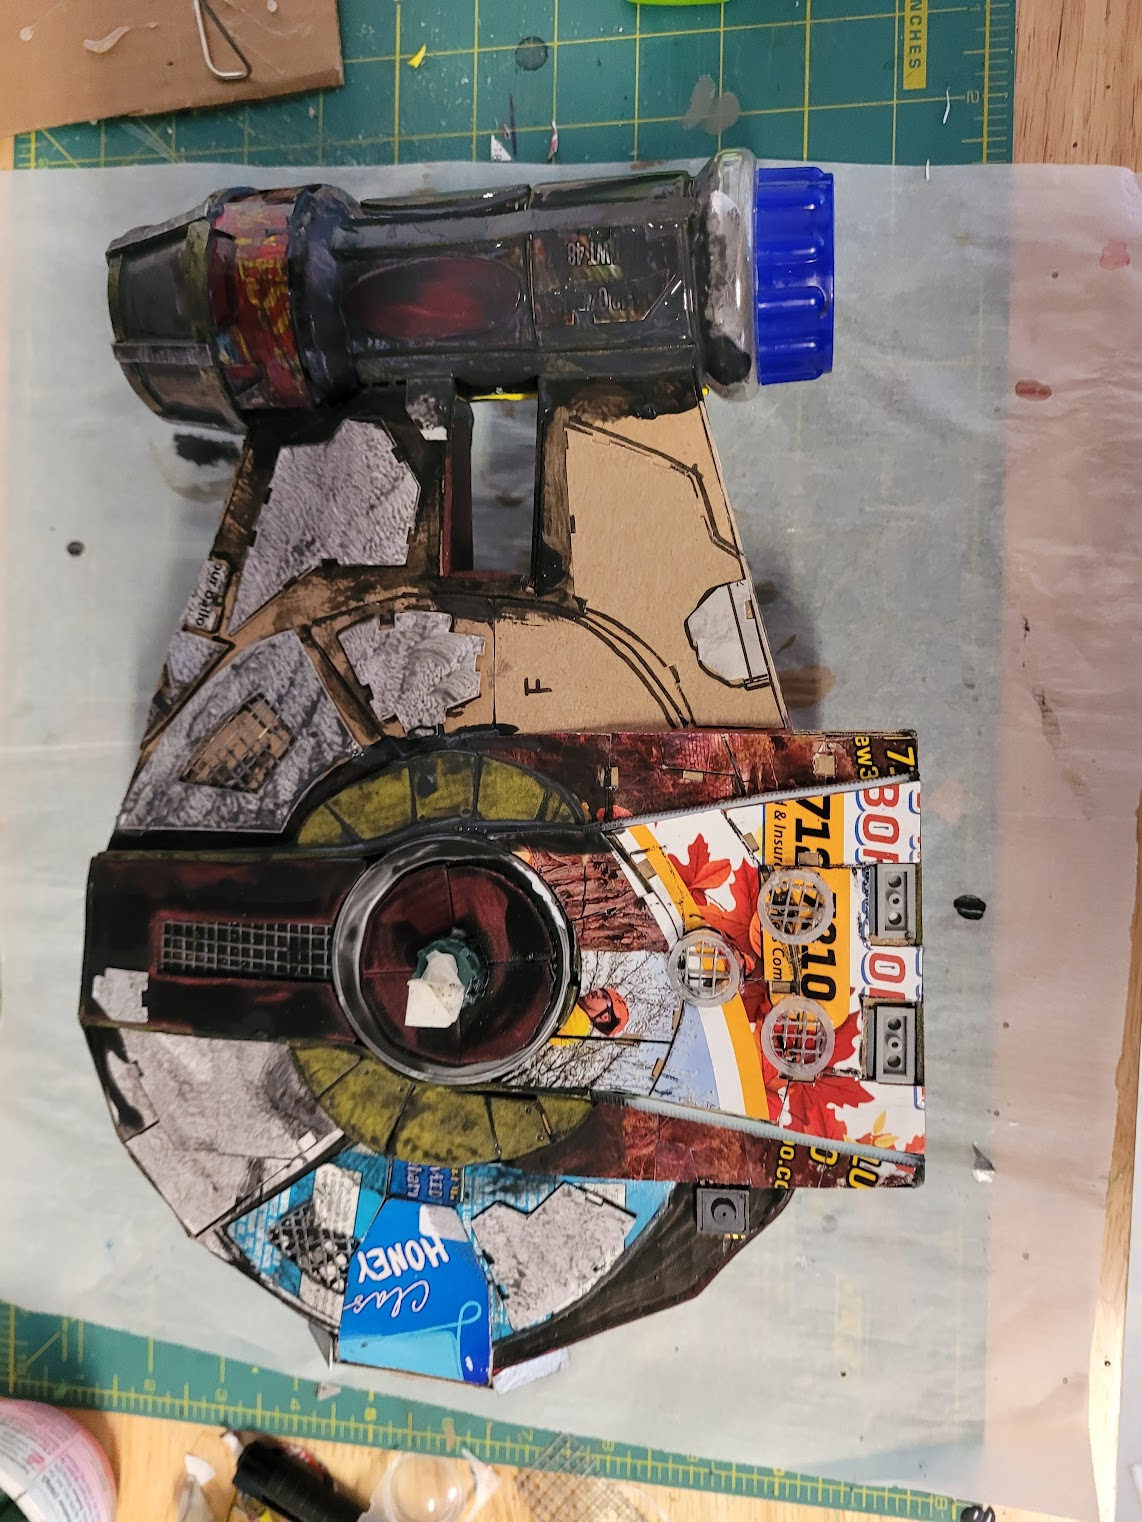
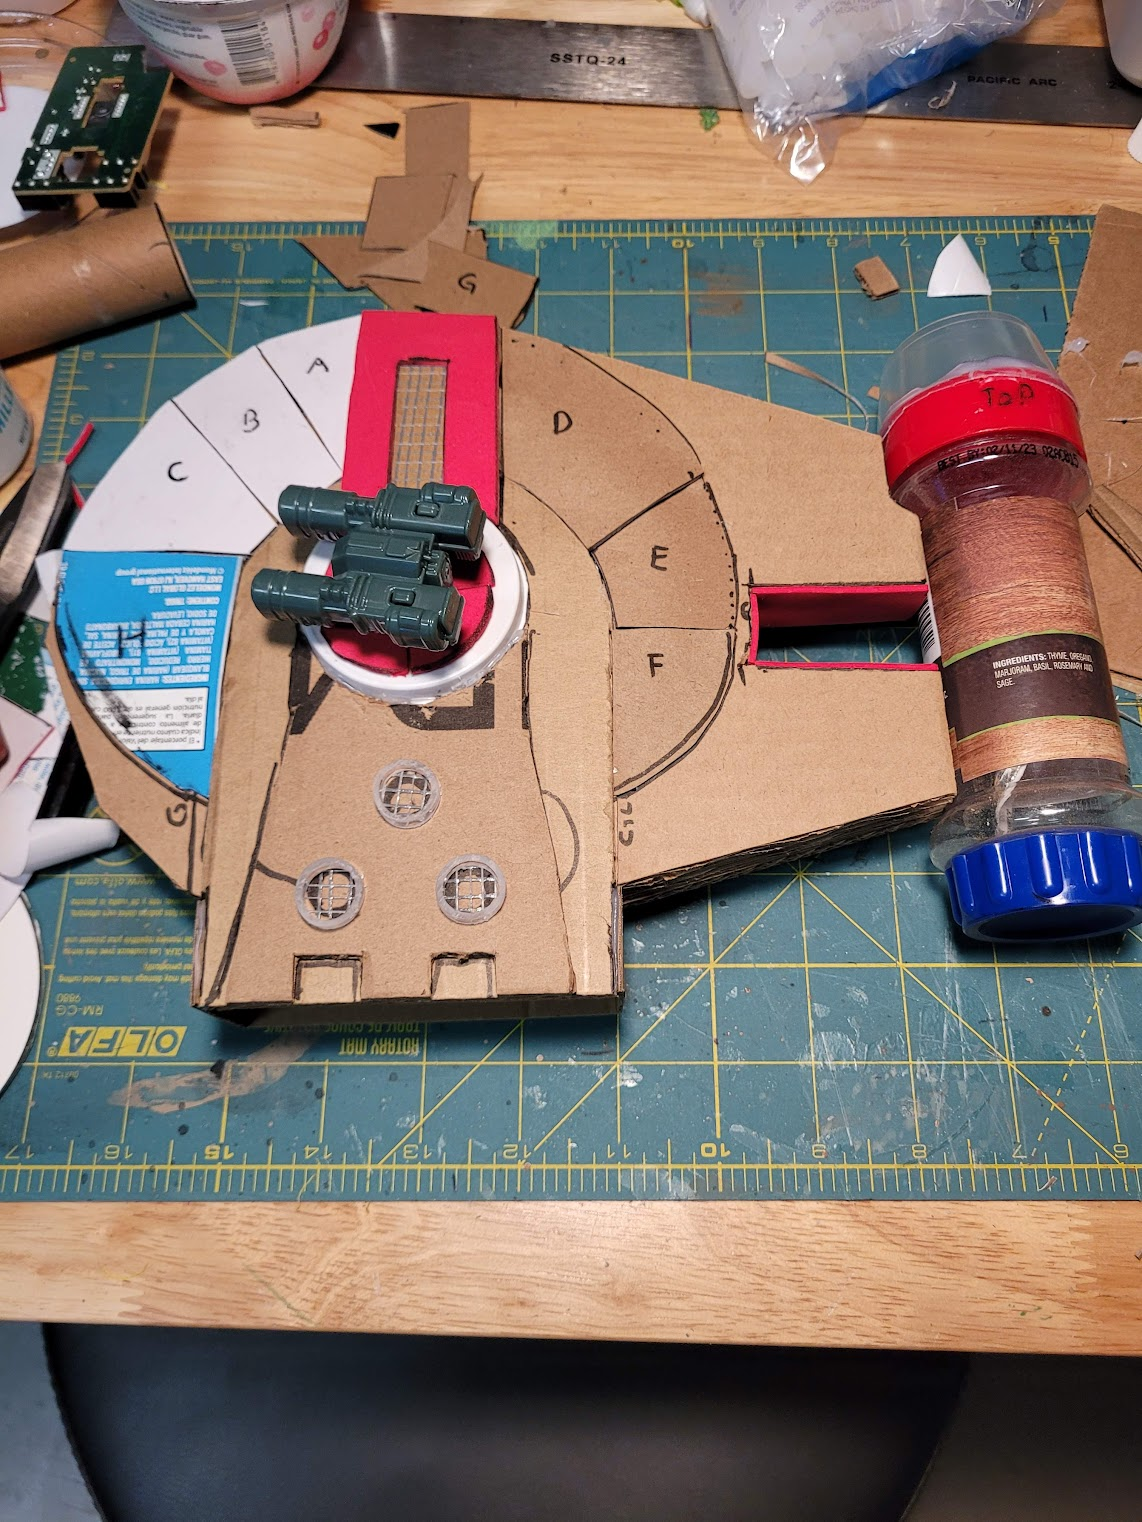
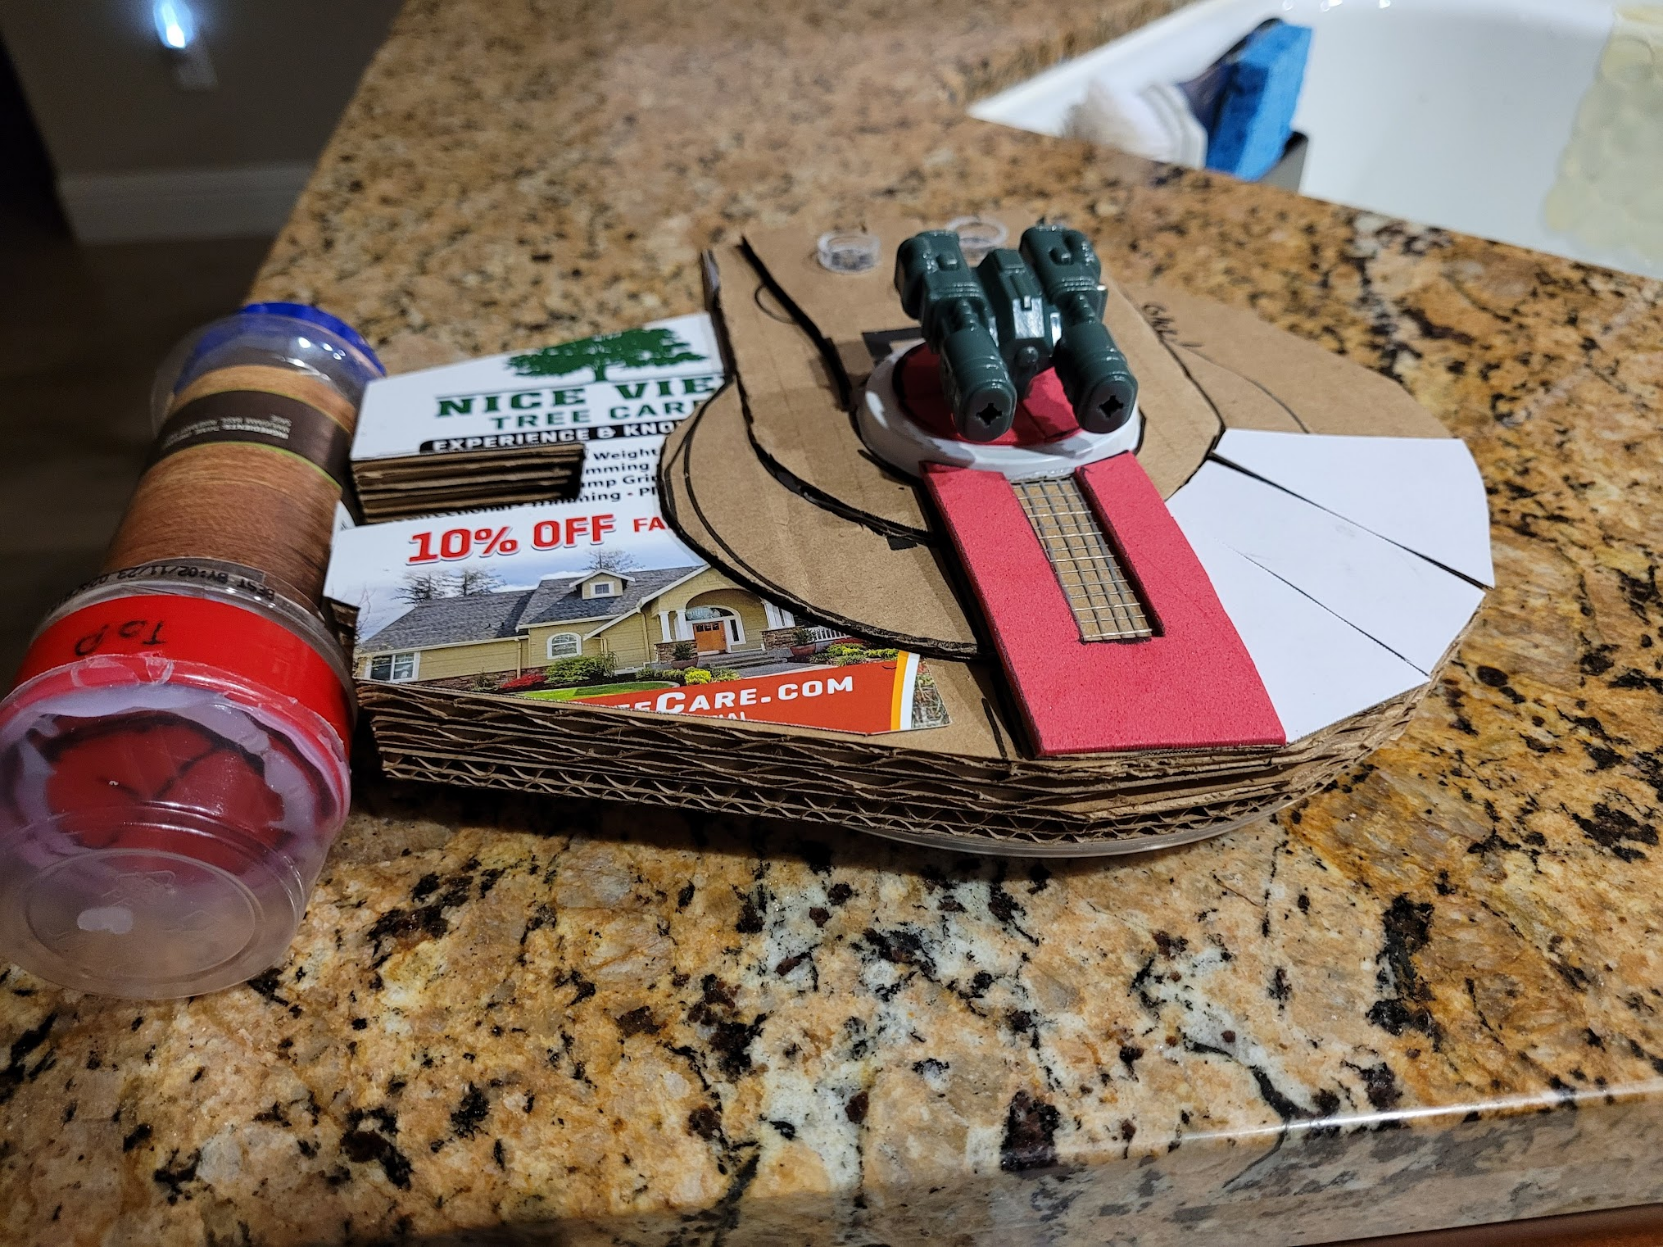
#ttrpg #ScratchBuilt #StarWars #Starship #SciFi #TerrainBuilding step 6.
I finish the paneling for the dome section of the ship. You can see I labeled stuff with a marker so I would place it in the correct place with the hot glue. I also begin using some craft foam to cover the corrugation of the sides of the ship.
#ttrpg #Scratchbuilt #starwars #Starship #scifi #terrainbuilding
BASHMAN · @BasicActionGames
105 followers · 384 posts · Server dice.camp
#ScratchBuilt #StarWars #Starship #SciFI #TerrainBuilding continued, Step 6.
I cut wedge-shaped pieces of cardstock and begin to apply them around the perimeter of the area that should be rounded with hot glue. This creates rounded starship paneling. I also apply some foam and drywall tape to make a vent at the front end.
#ttrpg
#Scratchbuilt #starwars #Starship #scifi #terrainbuilding #ttrpg
BASHMAN · @BasicActionGames
105 followers · 383 posts · Server dice.camp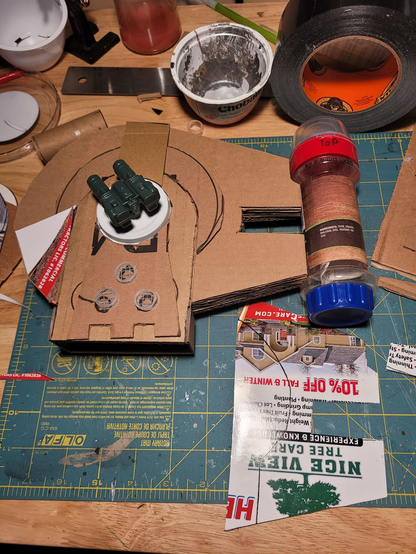
#ScratchBuilt #StarWars #Starship #SciFi #TerrainBuilding continues; step 5.
I add another layer of cardboard to accent the hull in places. I cut a plastic tube to make exhaust vents. I use a bit of drywall tape to make the vents look more vent-like. I add a cardboard disk to help make a rounded top (you'll see how it turns out).
#Scratchbuilt #starwars #Starship #scifi #terrainbuilding
BASHMAN · @BasicActionGames
105 followers · 382 posts · Server dice.camp
#ScratchBuilt #StarWars #Starship #SciFi #TerrainBuilding continues. Step 4.
I've added "Granny Grid" to the thrusters and cut some junkmail card into the shape of some of the hull. I will cut this up to make some paneling for the hull later.
#Scratchbuilt #starwars #Starship #scifi #terrainbuilding
BASHMAN · @BasicActionGames
105 followers · 381 posts · Server dice.camp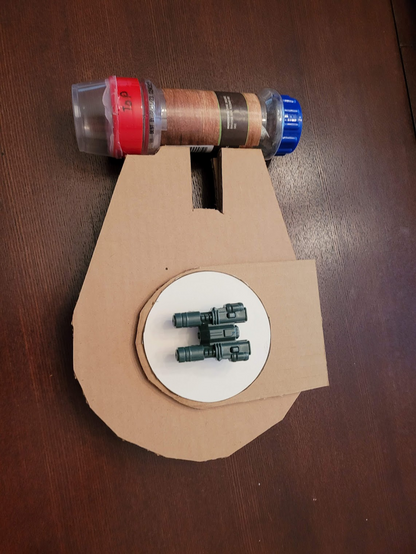
My #ScratchBuilt #StarWars #SciFi #StarShip #TerrainBuilding walkthrough step 3. Unhappy with the previous configuration, I constructed a piece that would house the thrusters and also the central turret. I hot-glued it all together.
#Scratchbuilt #starwars #scifi #Starship #terrainbuilding
BASHMAN · @BasicActionGames
105 followers · 378 posts · Server dice.camp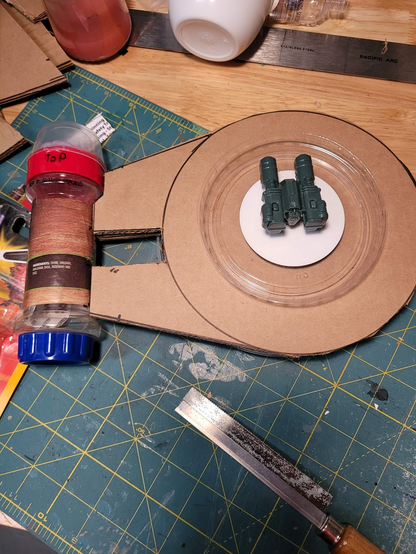
My #ScratchBuilt #starship for my #ttrpg #SciFi campaign Step 2: Dry Fitting the pieces together. I've added a lid and a dollar store toy turret. #TerrainBuilding
#Scratchbuilt #Starship #ttrpg #scifi #terrainbuilding
BASHMAN · @BasicActionGames
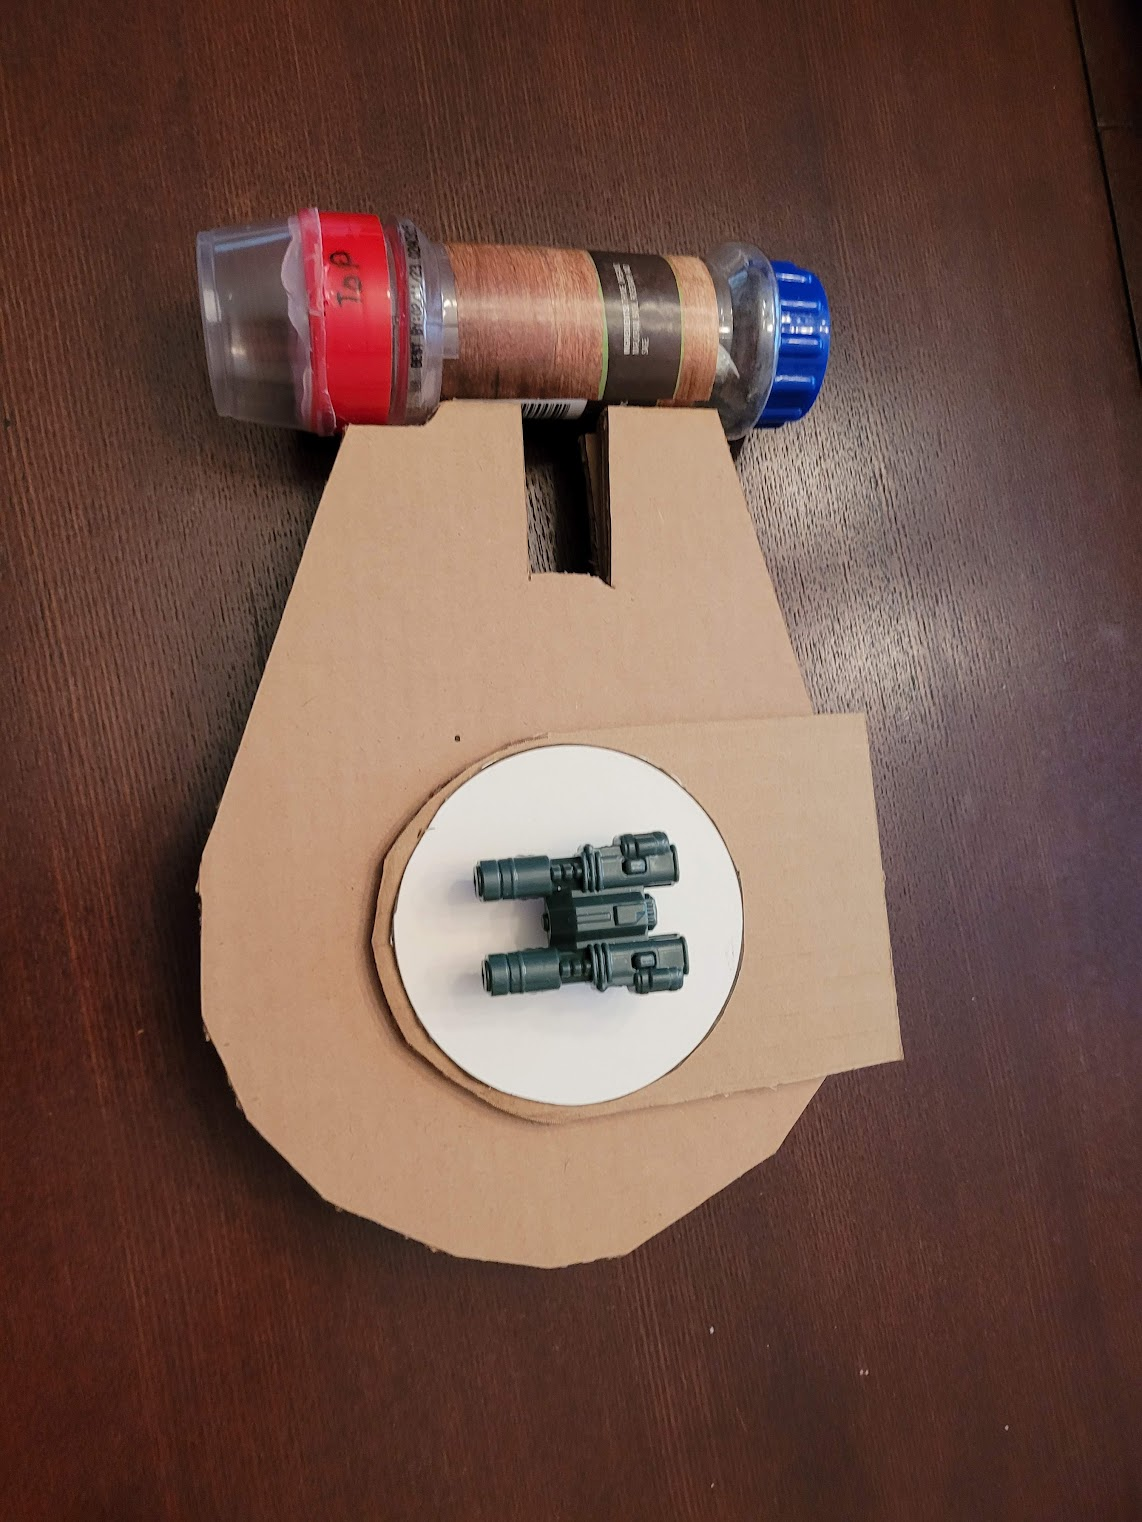
105 followers · 377 posts · Server dice.camp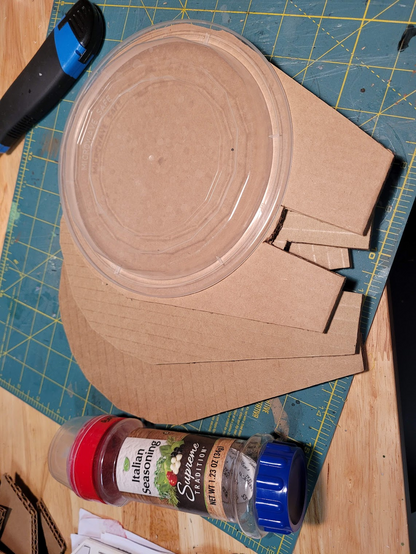
How I #ScratchBuilt my #starship for my #ttrpg #SciFi campaign. Step 1: Begin with a takeout container, a spice bottle, and three pieces of double corregated cardboard cut to shape. One of those cutouts was 90 degrees different than the other two to ensure it wouldn't warp when sandwiched together.
#TerrainBuilding
#Scratchbuilt #Starship #ttrpg #scifi #terrainbuilding
BASHMAN · @BasicActionGames
105 followers · 376 posts · Server dice.camp@strydernotavi @SJohnRoss sounds good to me. I like #ScratchBuilt or #TerrainBuilding
#Scratchbuilt #terrainbuilding

Archiviste Dragontigre · @Archiviste_Dragontigre
153 followers · 2115 posts · Server tabletop.socialDeathtrap Dungeon: Ian McCaig's iconic illustration re-made | The Lost and the Very Damned
https://thelostandtheverydamned.blogspot.com/2015/11/deathtrap-dungeon-ian-mccaigs-iconic.html
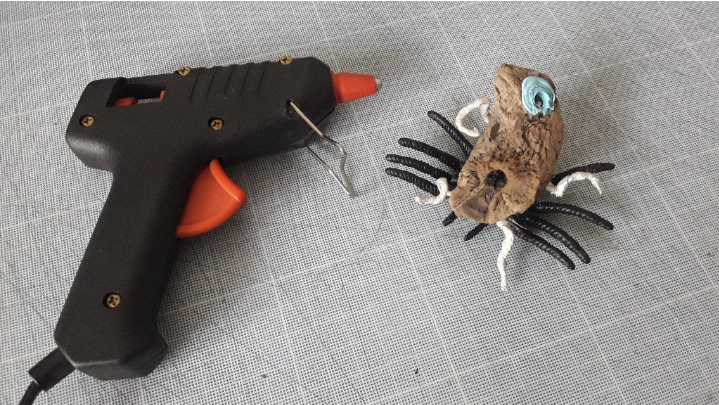
Balsa wood, card, a bit of paper (for the scroll) a Mantic skeleton, some bitz and some paints.
Archiviste Dragontigre · @Archiviste_Dragontigre
153 followers · 2115 posts · Server tabletop.social
"C'est la petite Josette, qui n'en fait qu'à sa tête..."
#Scratchbuilt
Inspired by: https://youtu.be/eeW4AOeVMK8
Archiviste Dragontigre · @Archiviste_Dragontigre
153 followers · 2115 posts · Server tabletop.social
Oh... What the %$*... why not?!
So... #tabletopmonthly Challenge
#ttm2 + #ProjectPerilous "The Whateleys": here comes
#TheDunwichHorror.
Let's see how it will turn out...
#Scratchbuilt #Minis
#tabletopmonthly #ttm2 #ProjectPerilous #TheDunwichHorror #Scratchbuilt #minis