
Mathieu Hery · @mh8
62 followers · 163 posts · Server mastodon.xyz
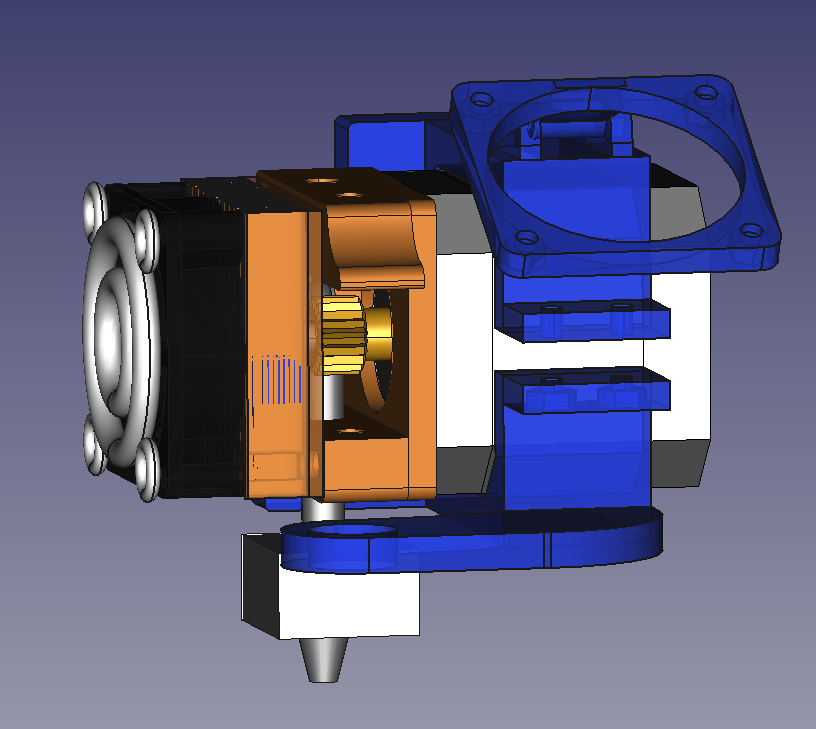
The MK8 extruder seems nice, but I've been encountering a few hiccups with it and the i3 1.5 Rework architecture.
I'm designing my own X-carriage to accomodate the mK8 with the Z probe sensor AND a fan that can effectively cool the print, which is absolutely necessary to achieve proper prints.
I couldn't find anything that matched all these criterias to my satisfaction so I started drawing my own from scratch in #FreeCAD
Mathieu Hery · @mh8
62 followers · 163 posts · Server mastodon.xyzFor some obscure reason there were two slots ready for two male pins that weren't already soldered on the RAMPS 1.4 board I had bought years back for Jenny.
The RAMPS board is an all-in-one shield for Arduino Mega boards transforming it into a 3D printer motherboard capable of controlling stepper motors, reading temperature sensors, endstops, etc.
The missing pins I needed were for powering the extruder fan for cooling.
Mathieu Hery · @mh8
62 followers · 163 posts · Server mastodon.xyzMy previous toot on Jenny's revamp is dated 28/02.
In the meantime I've done the following, more or less in this order :
- cable electronics
- discover I'd have to design my own X carriage
- redraw the MK8 extruder and start designing a custom X carriage
- flash the firmware
- connect to a controller and start debugging the firmware
- set the current limit on stepper drivers
- solder missing pins on the electronic board
Mathieu Hery · @mh8
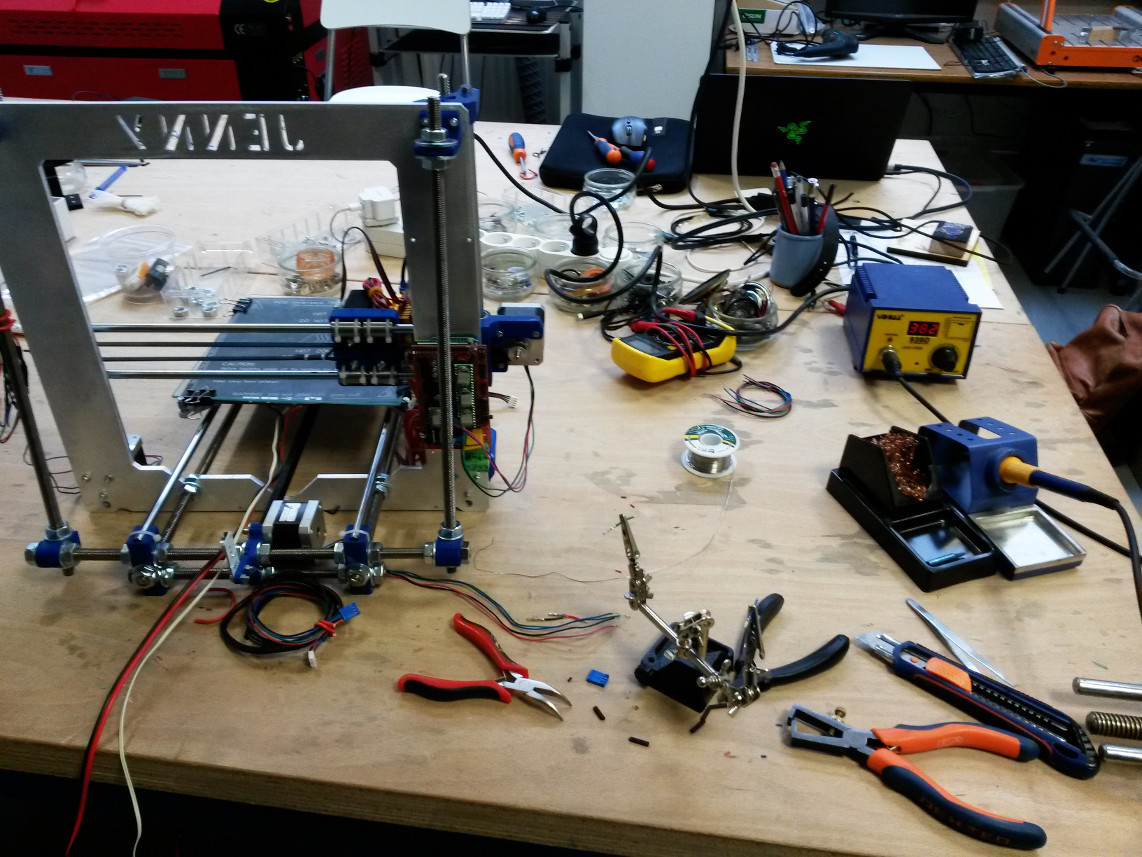
62 followers · 163 posts · Server mastodon.xyz
Now that I got the belts and heatbed in place, I'm getting to the electronics.
The mainframe has a sweet spot to fit the Arduino and Ramps.
I'm currently re-soldering everything to the proper lengths.
Mathieu Hery · @mh8
62 followers · 163 posts · Server mastodon.xyzI had a problem yesterday with my X belt stretcher because I didn't have an M3 50mm bolt, and couldn't get my hands on one in the hardware store.
What I could find, however, was some 3mm threaded rods.
I bought one & cut a 50mm piece. A bit of epoxy glue and a nut and I had what I needed.
Had to reprint the X stretcher though, I had ruined the first one in failed experiments.
Mathieu Hery · @mh8
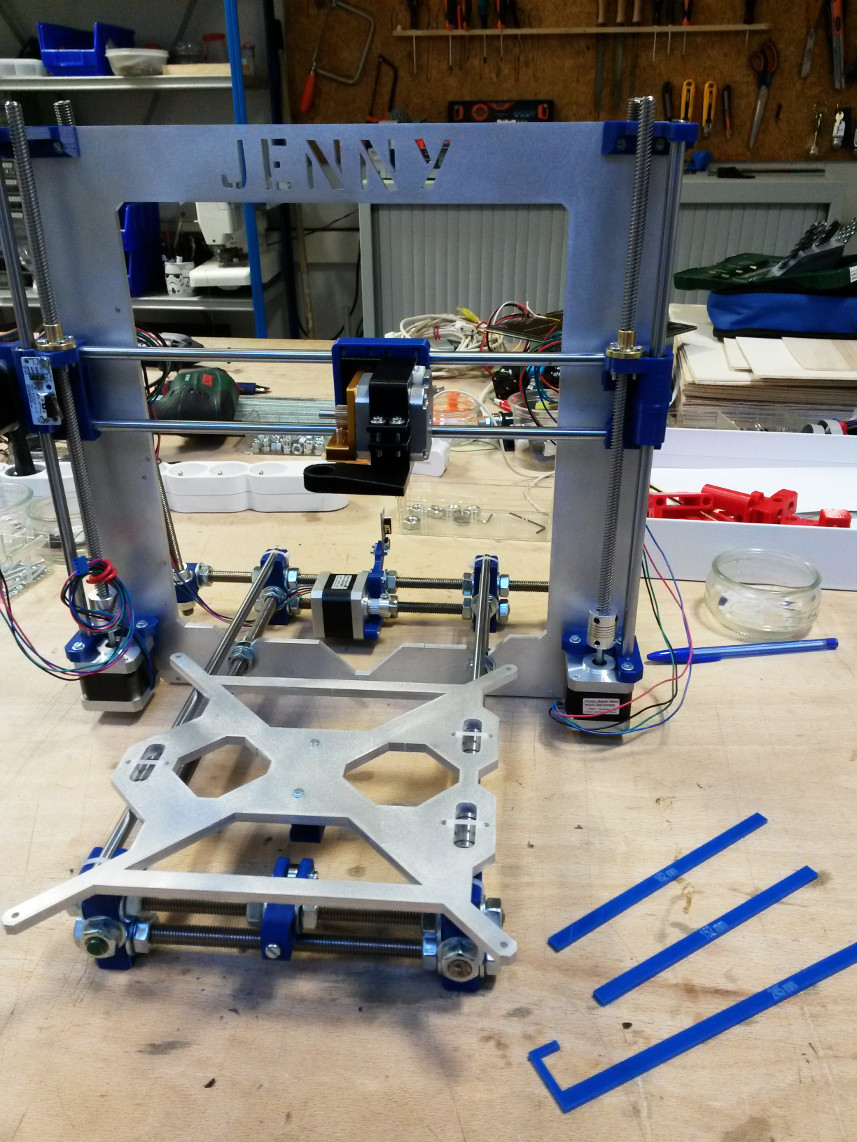
62 followers · 163 posts · Server mastodon.xyz
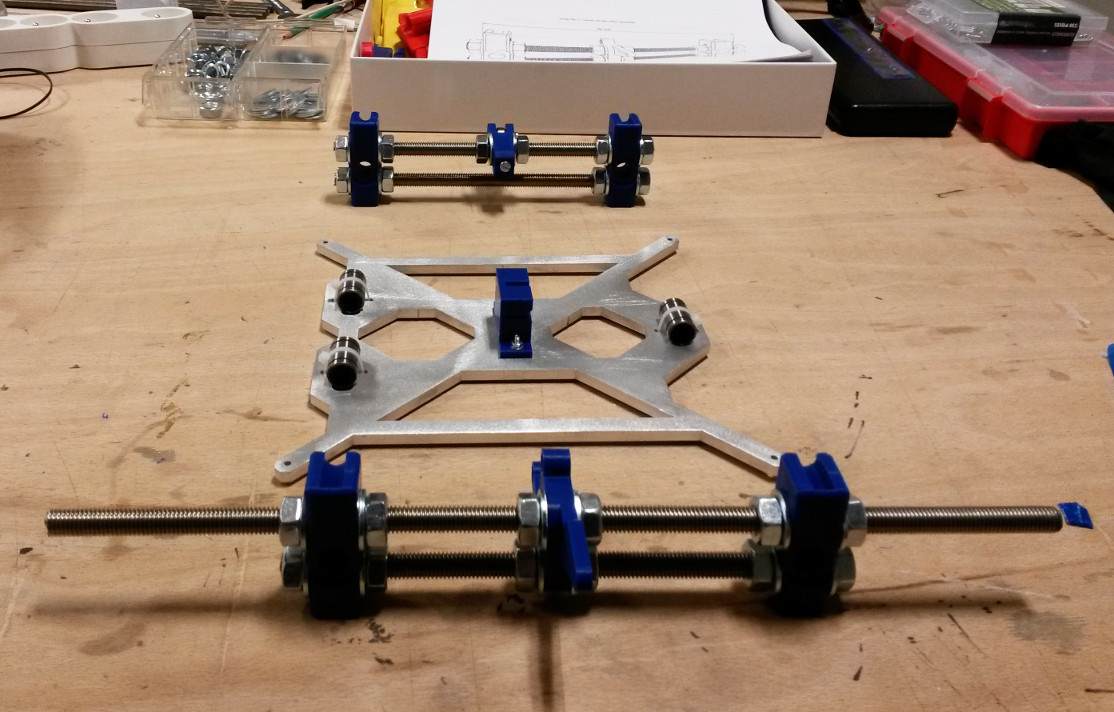
Immediately following my previous toot, Jenny's new frame is now fully assembled and tightened.
The rigidity, as compared to the Mendel i2 frame, is impressive.
At the rear you can see the two added threaded rods making a right triangle to improve rigidity. As previously tooted, directly incorporating a design upgrade.
All the motors are in place as well.
I'll be working on the extruder, heatbed and GT2 belts today.
Mathieu Hery · @mh8
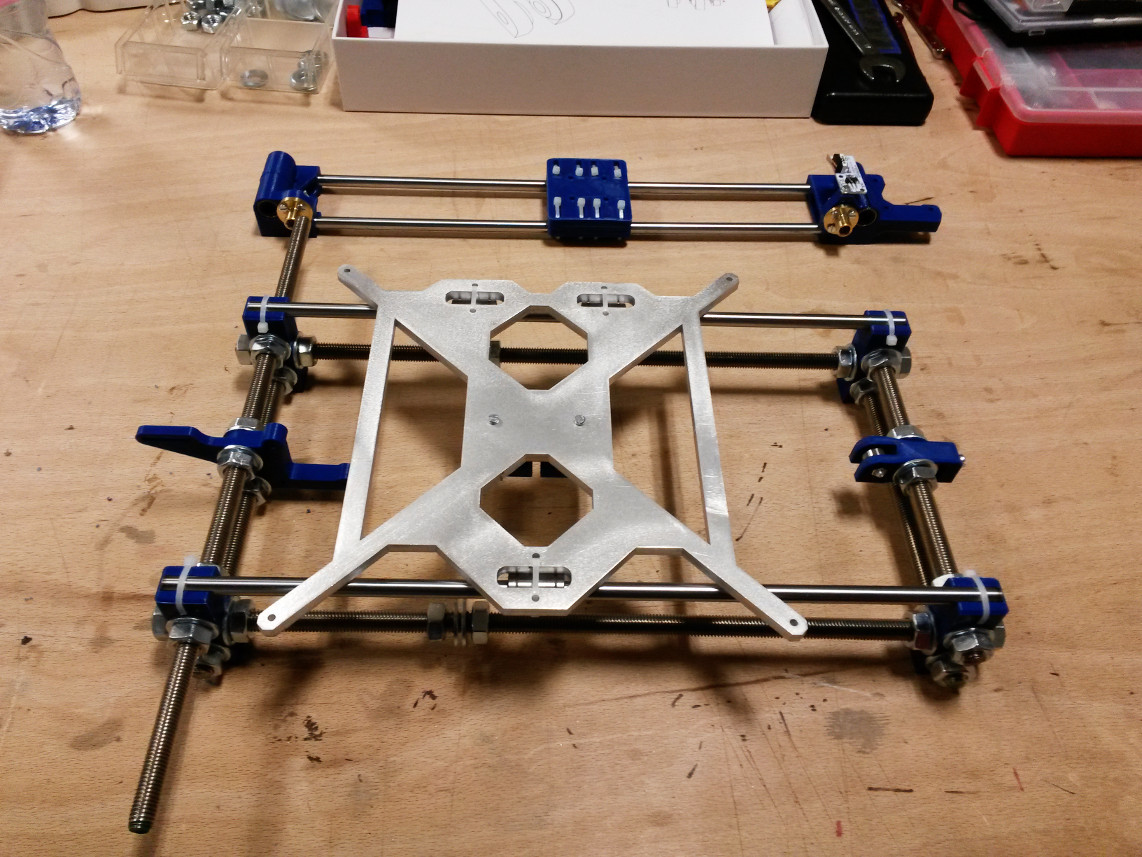
62 followers · 163 posts · Server mastodon.xyz
Here's the full bottom frame as it will clip on the mainframe in the upcoming assembly steps.
Last week I tooted about incorporating a design upgrade, that's why one of the threaded rods is longer than the others (360mm vs 210mm).
It's the base on which will rest two more threaded rods forming a straight-angle triangle with the mainframe to improve overall rigidity.
Mathieu Hery · @mh8
62 followers · 163 posts · Server mastodon.xyz
For those with keen-eyes, this is a close-up of what you could glimpse on the other side of the work-bench in my previous picture of Jenny i2 being disassembled.
It's the early assembly of the frame built with the threaded rods.
Looking forward to what comes next !
Stay tuned...
Mathieu Hery · @mh8
62 followers · 163 posts · Server mastodon.xyz
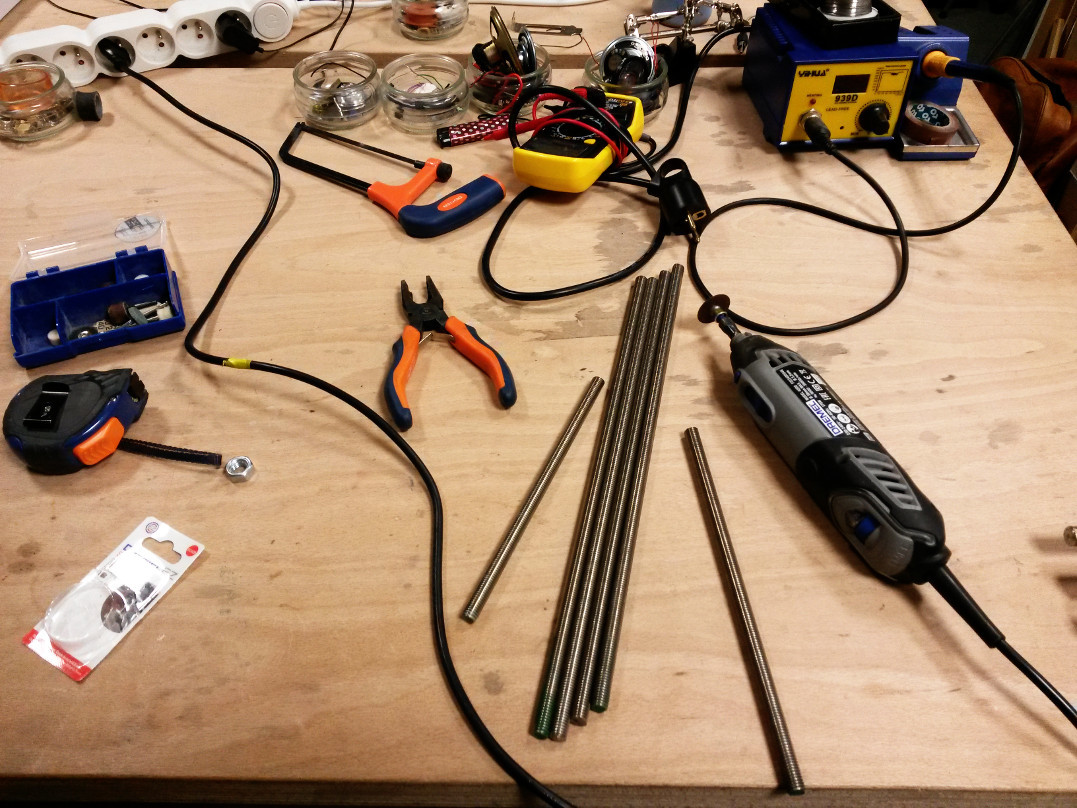
And I just spent the last hour and a half cutting 10mm thick stainless steel threaded rods with a dremel and you gotta admit, stainless steel is pretty tough.
It gnawed through a few disks as I worked through it but I've got all the rods I need now.
All the supplies I ordered have arrived so tomorrow I'll be dismantling Jenny and beginning the assembly, which is the funnest part ! Yay !🤗
Time to go home and shower now !
Mathieu Hery · @mh8
62 followers · 163 posts · Server mastodon.xyz
So Thursday I went to the hardware store and bought some missing stuff for Jenny's revamp.
I can't salvage the 8mm threaded rods from the i2 frame so I have to start anew with cutting the rods.
These are the three 1 meter long, 10mm diameter, stainless steel rods I'll be cutting next week for the frame.
The steel doesn't have to be stainless, but it'll last a lot longer in time if it is.
Plus it looks and feels a lot better. 😉
Mathieu Hery · @mh8
62 followers · 163 posts · Server mastodon.xyz
I discovered the FLSUN variant of the i3 design by chance in the hackerspace I go to sometimes.
For some obscure reason they made the absolutely absurd decision of placing the Z motors on top, held in place by a 4mm thick acrylic laser-cut part.
The torsion on that part is huge !
I'll be designing a 3D part in the coming weeks to replace that crappy part and improve the stability of the X axis.
We're just putting her back in shape.
Mathieu Hery · @mh8
62 followers · 163 posts · Server mastodon.xyz
A couple years ago I built a Prusa Mendel i2 from scratch. It was my first steps both in 3D Printing and 3D printer-building. I named it Jenny.
The i2 architecture is total crap. I mean it works, but it's got big weaknesses, and has been outdated for ages now. In fact it was already outdated by the time i had finished mine.
I've been wanting to upgrade Jenny to an i3 ever since I built her, and I finally got into it. I'll be tooting about it along the way !